Meshes
A compas.datastructures.Mesh uses a halfedge data structure to represent the topology and geometry of a polygonal mesh,
and to facilitate the application of topological and geometrical operations on it.
In addition, it provides a number of methods for storing arbitrary data on vertices, edges and faces, and the overall mesh itself.
Note
Please refer to the API for a complete overview of all functionality:
Mesh Construction
Meshes can be constructed in a number of ways:
from scratch, by adding vertices and faces one by one,
using a special constructor function, or
from the data contained in a file.
From Scratch
>>> from compas.datastructures import Mesh
>>> mesh = Mesh()
>>> a = mesh.add_vertex(x=0, y=0, z=0)
>>> b = mesh.add_vertex(x=1, y=0, z=0)
>>> c = mesh.add_vertex(x=1, y=1, z=0)
>>> d = mesh.add_vertex(x=0, y=1, z=0)
>>> face = mesh.add_face([a, b, c, d])
>>> mesh
<Mesh with 4 vertices and 1 faces>
Using Constructors
>>> from compas.datastructures import Mesh
>>> mesh = Mesh.from_lines(...)
>>> mesh = Mesh.from_meshgrid(...)
>>> mesh = Mesh.from_polygons(...)
>>> mesh = Mesh.from_polyhedron(...)
>>> mesh = Mesh.from_shape(...)
>>> mesh = Mesh.from_vertices_and_faces(...)
From Data in a File
>>> from compas.datastructures import Mesh
>>> mesh = Mesh.from_obj('mesh.obj')
>>> mesh = Mesh.from_off('mesh.off')
>>> mesh = Mesh.from_ply('mesh.ply')
>>> mesh = Mesh.from_stl('mesh.stl')
Visualisation
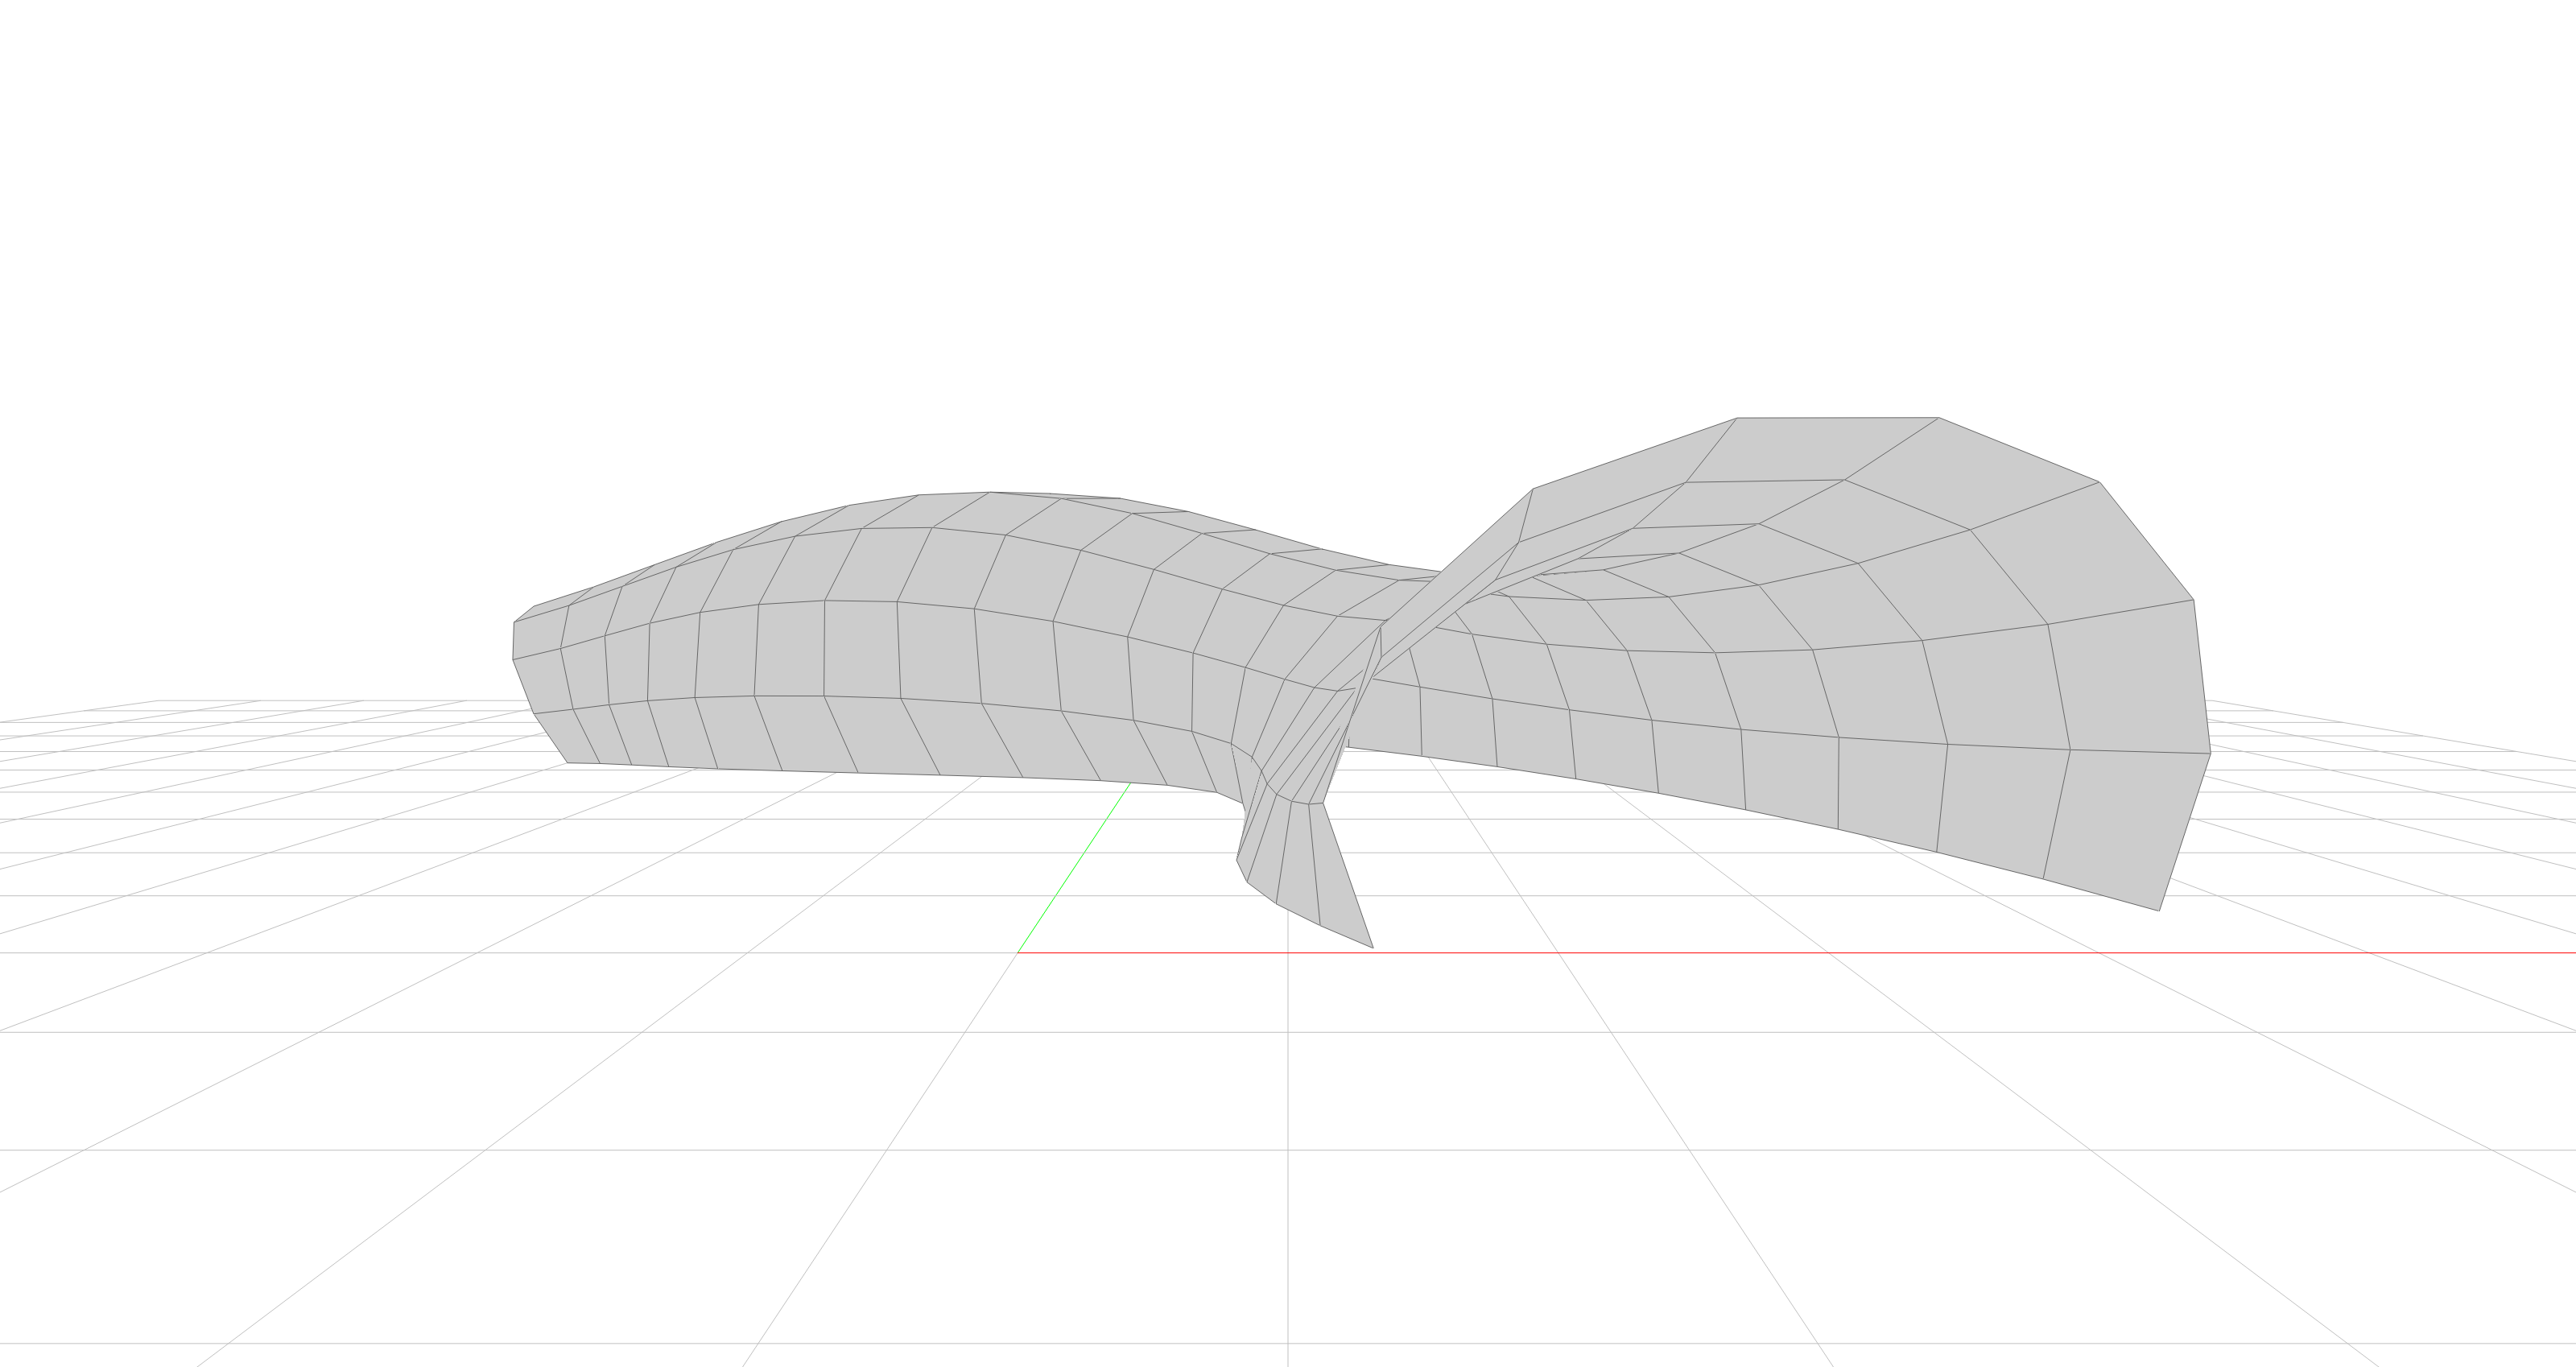
Like all other COMPAS geometry objects and data structures, meshes can be visualised by placing them in a scene.
For more information about visualisation with compas.scene.Scene, see Visualisation.
>>> from compas.datastructures import Mesh
>>> from compas.scene import Scene
>>> mesh = Mesh.from_obj(compas.get('tubemesh.obj'))
>>> scene = Scene()
>>> scene.add(mesh)
>>> scene.show()
Vertices, Edges, Faces
A mesh has vertices, edges, and faces. Vertices are identified by a positive integer that is unique among the vertices of the current mesh. Faces are identified by a positive integer that is unique among the faces of the current mesh. Edges are identified by a pair (tuple) of two vertex identifiers.
>>> mesh = Mesh.from_meshgrid(dx=10, dy=10, nx=10, ny=10)
>>> mesh.number_of_vertices()
121
>>> mesh.number_of_edges()
200
>>> mesh.number_of_faces()
81
Vertex, edge, and face accessors are generators: they are meant to be used in loops.
>>> mesh.vertices()
<generator object Mesh.vertices at ...>
>>> mesh.edges()
<generator object Mesh.edges at ...>
>>> mesh.faces()
<generator object Mesh.faces at ...>
>>> for vertex in mesh.vertices():
...     # do something with this vertex
...     print(vertex)
...
0
1
2
...
>>> for edge in mesh.edges():
...     # do something with this edge
...     print(edge)
...
(0, 1)
(1, 2)
(2, 3)
...
>>> for face in mesh.faces():
...     # do something with this face
...     print(face)
...
0
1
2
...
Lists of vertices, edges, and faces have to be constructed explicitly.
>>> vertices = list(mesh.vertices())
>>> vertices
[0, 1, 2, 3, 4, 5, 6, 7, 8, 9, ..., 120]
>>> edges = list(mesh.edges())
>>> edges
[(0, 1), (1, 2), (2, 3), (3, 4), (4, 5), ..., (115, 120)]
>>> faces = list(mesh.faces())
>>> faces
[0, 1, 2, 3, 4, 5, 6, 7, 8, 9, ..., 80]
Vertex, Edge, Face Attributes
Arbitrary data can be assigned to vertices, edges, and faces, as vertex/edge/face attributes, and to the overall mesh itself. To allow for serialisatin of the mesh and all the data associated with it, the data should be JSON serialisable. See Mesh Serialisation for more information.
The functionality is demonstrated here using vertex attributes. The mechanism is exactly the same for edges and faces.
It is good practice to declare default values for the added data attributes.
>>> mesh = Mesh.from_meshgrid(dx=10, dy=10, nx=10, ny=10)
>>> mesh.update_default_vertex_attributes(a=None, b=0.0, c=False)
Get the value of one attribute of one vertex.
>>> mesh.vertex_attribute(0, 'a')
None
Get the value of multiple attributes of one vertex.
>>> mesh.vertex_attributes(0, ['a', 'b'])
(None, 0.0)
Get the value of one attribute of all vertices.
>>> mesh.vertices_attribute('a')
[None, None, None, ... None]
Get the value of multiple attributes of all vertices.
>>> mesh.vertices_attributes(['b', 'c'])
[(0.0, False), (0.0, False), (0.0, False), ..., (0.0, False)]
Similarly, for a selection of vertices.
>>> mesh.vertices_attribute('b', vertices=[0, 1, 2, 3])
[0.0, 0.0, 0.0, 0.0]
>>> mesh.vertices_attributes(['a', 'c'], vertices=[0, 1, 2, 3])
[(None, False), (None, False), (None, False), (None, False)]
Updating attributes is currently only possible one vertex at a time.
>>> mesh.vertex_attribute(0, 'a', (1.0, 0.0, 0.0))
>>> for vertex in mesh.vertices():
...     if mesh.vertex_degree(vertex) == 2:
...         mesh.vertex_attribute(vertex, 'a', (1.0, 0.0, 0.0))
...
Finally, note that the xyz coordinates of vertices can be accessed and modified using the same functions.
>>> mesh.vertex_attributes(0, 'xyz')
(0.0, 0.0, 0.0)
>>> mesh.vertices_attribute('x')
[0.0, 1.0, 2.0, ..., 9.0]
Halfedge Data Structure
The topology of a mesh is stored in a halfedge data structure. In this data structure, vertices are connected to other vertices, and faces to other faces, via edges. An edge has two connected vertices, and at most two connected faces. Each edge is split into two halfedges, one for each of the connected faces. If an edge has only one connected face, the edge is on the boundary.
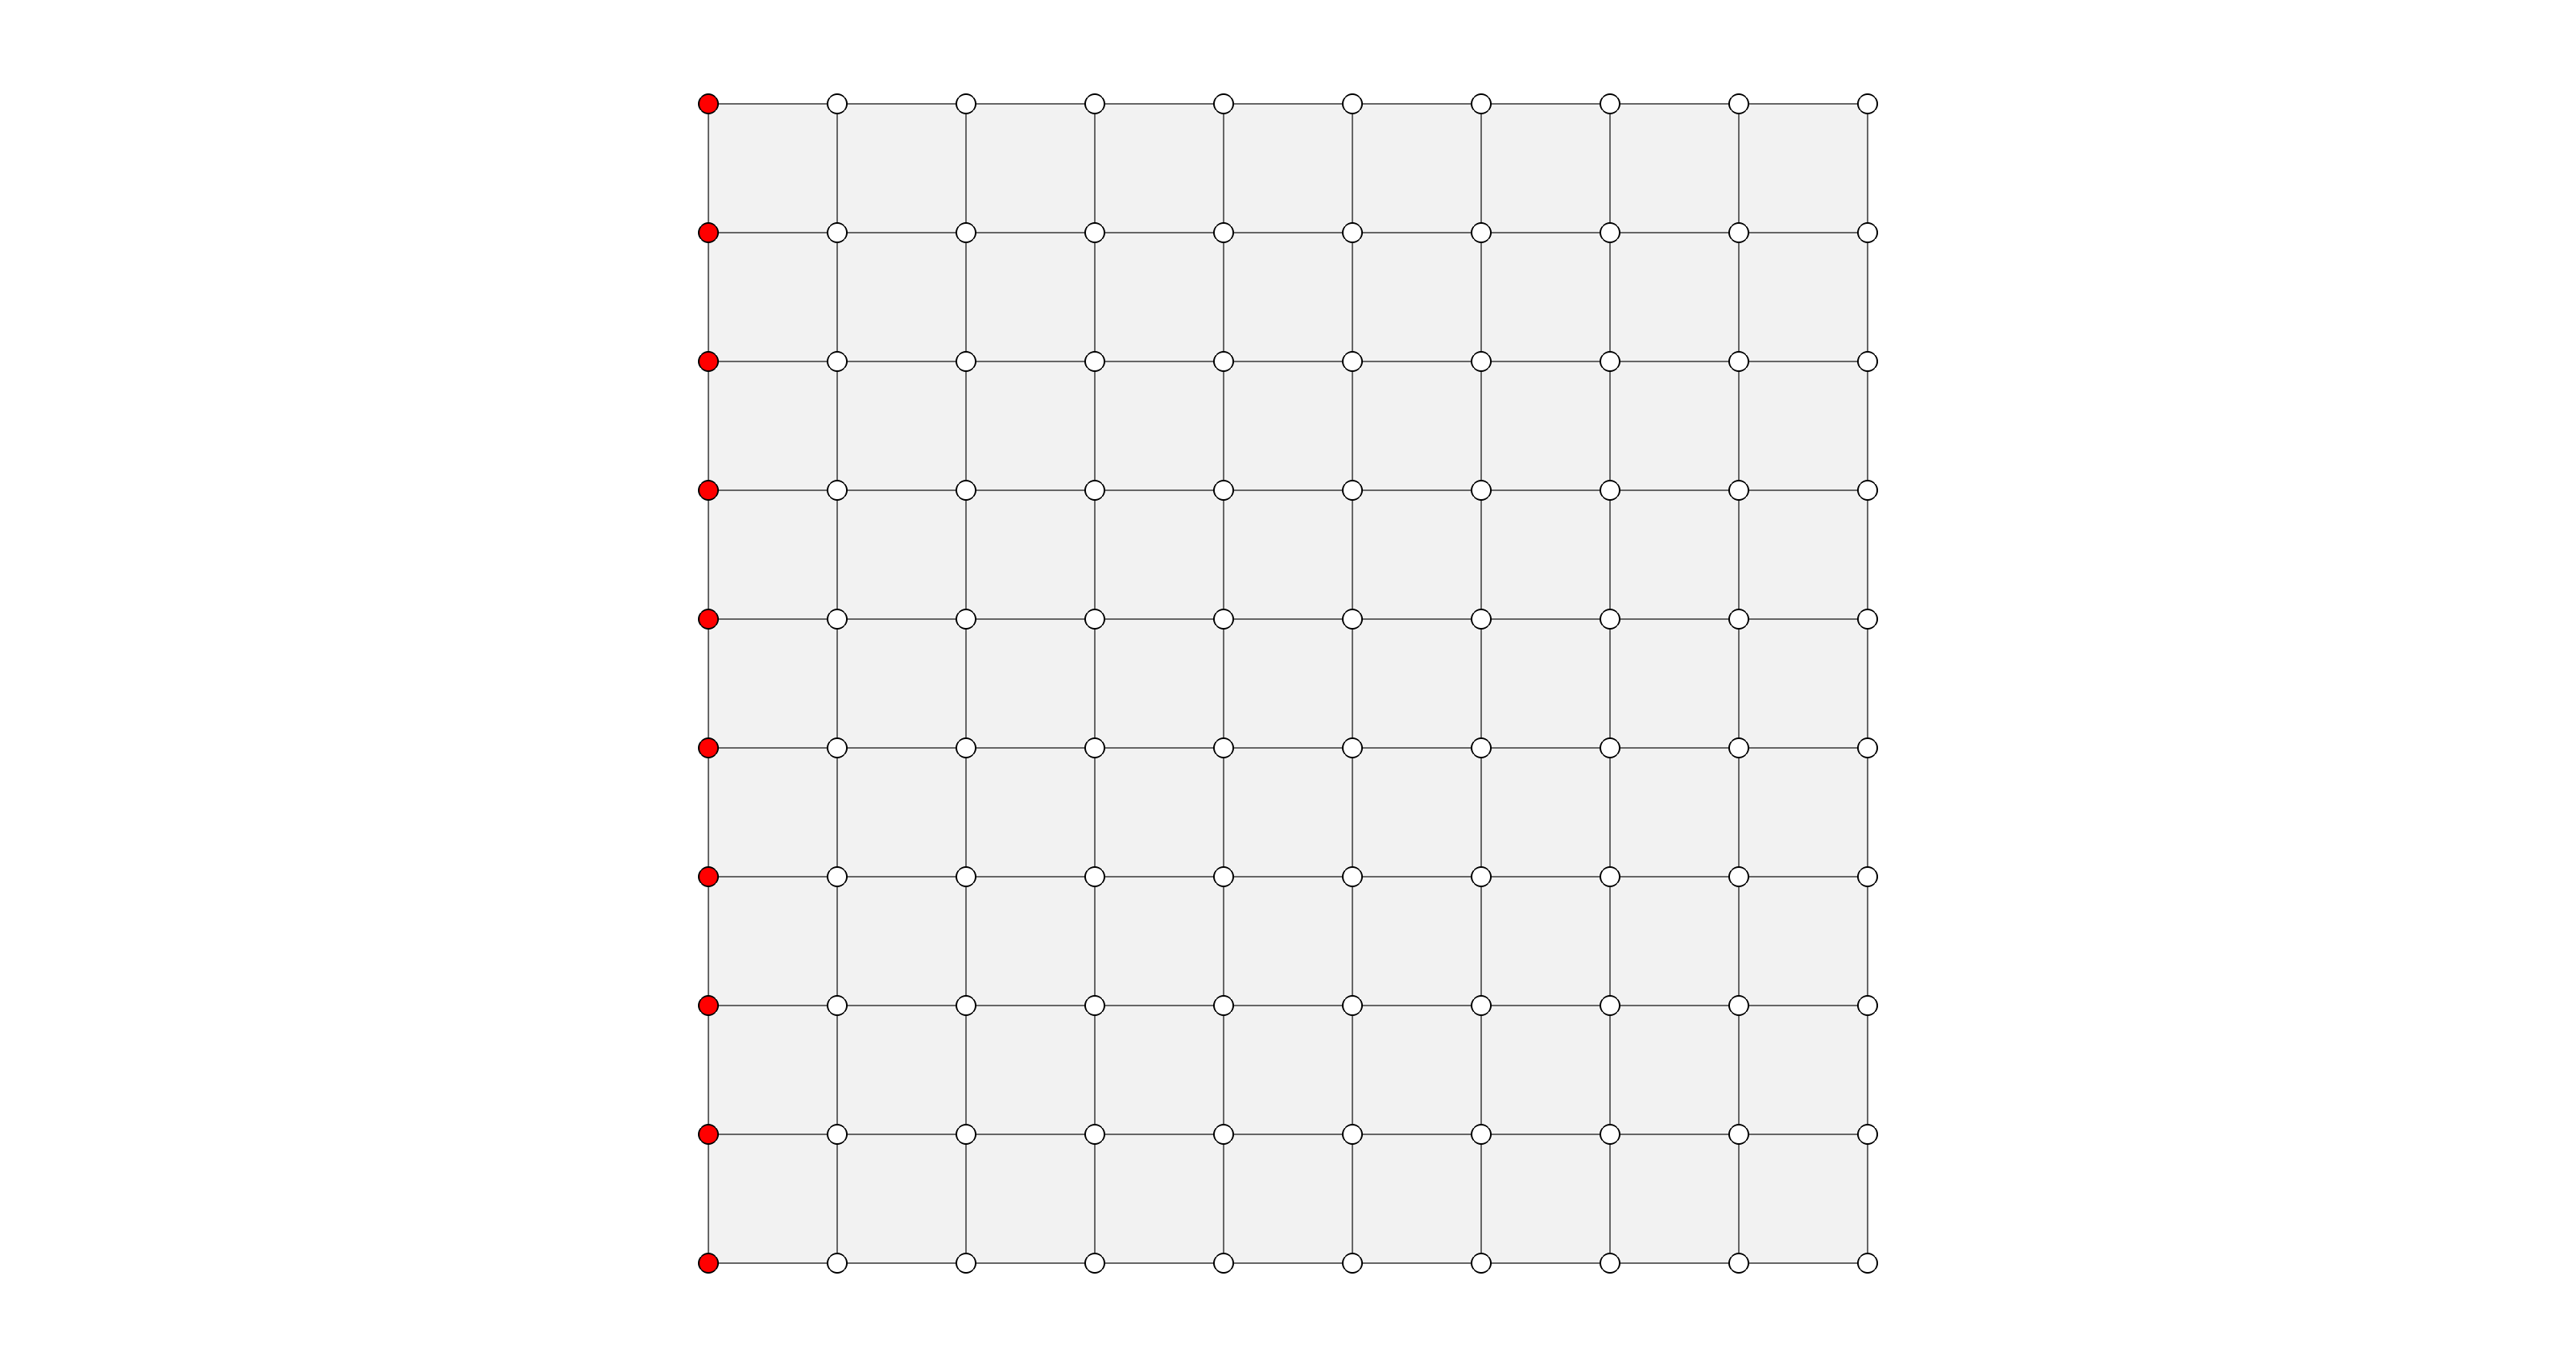
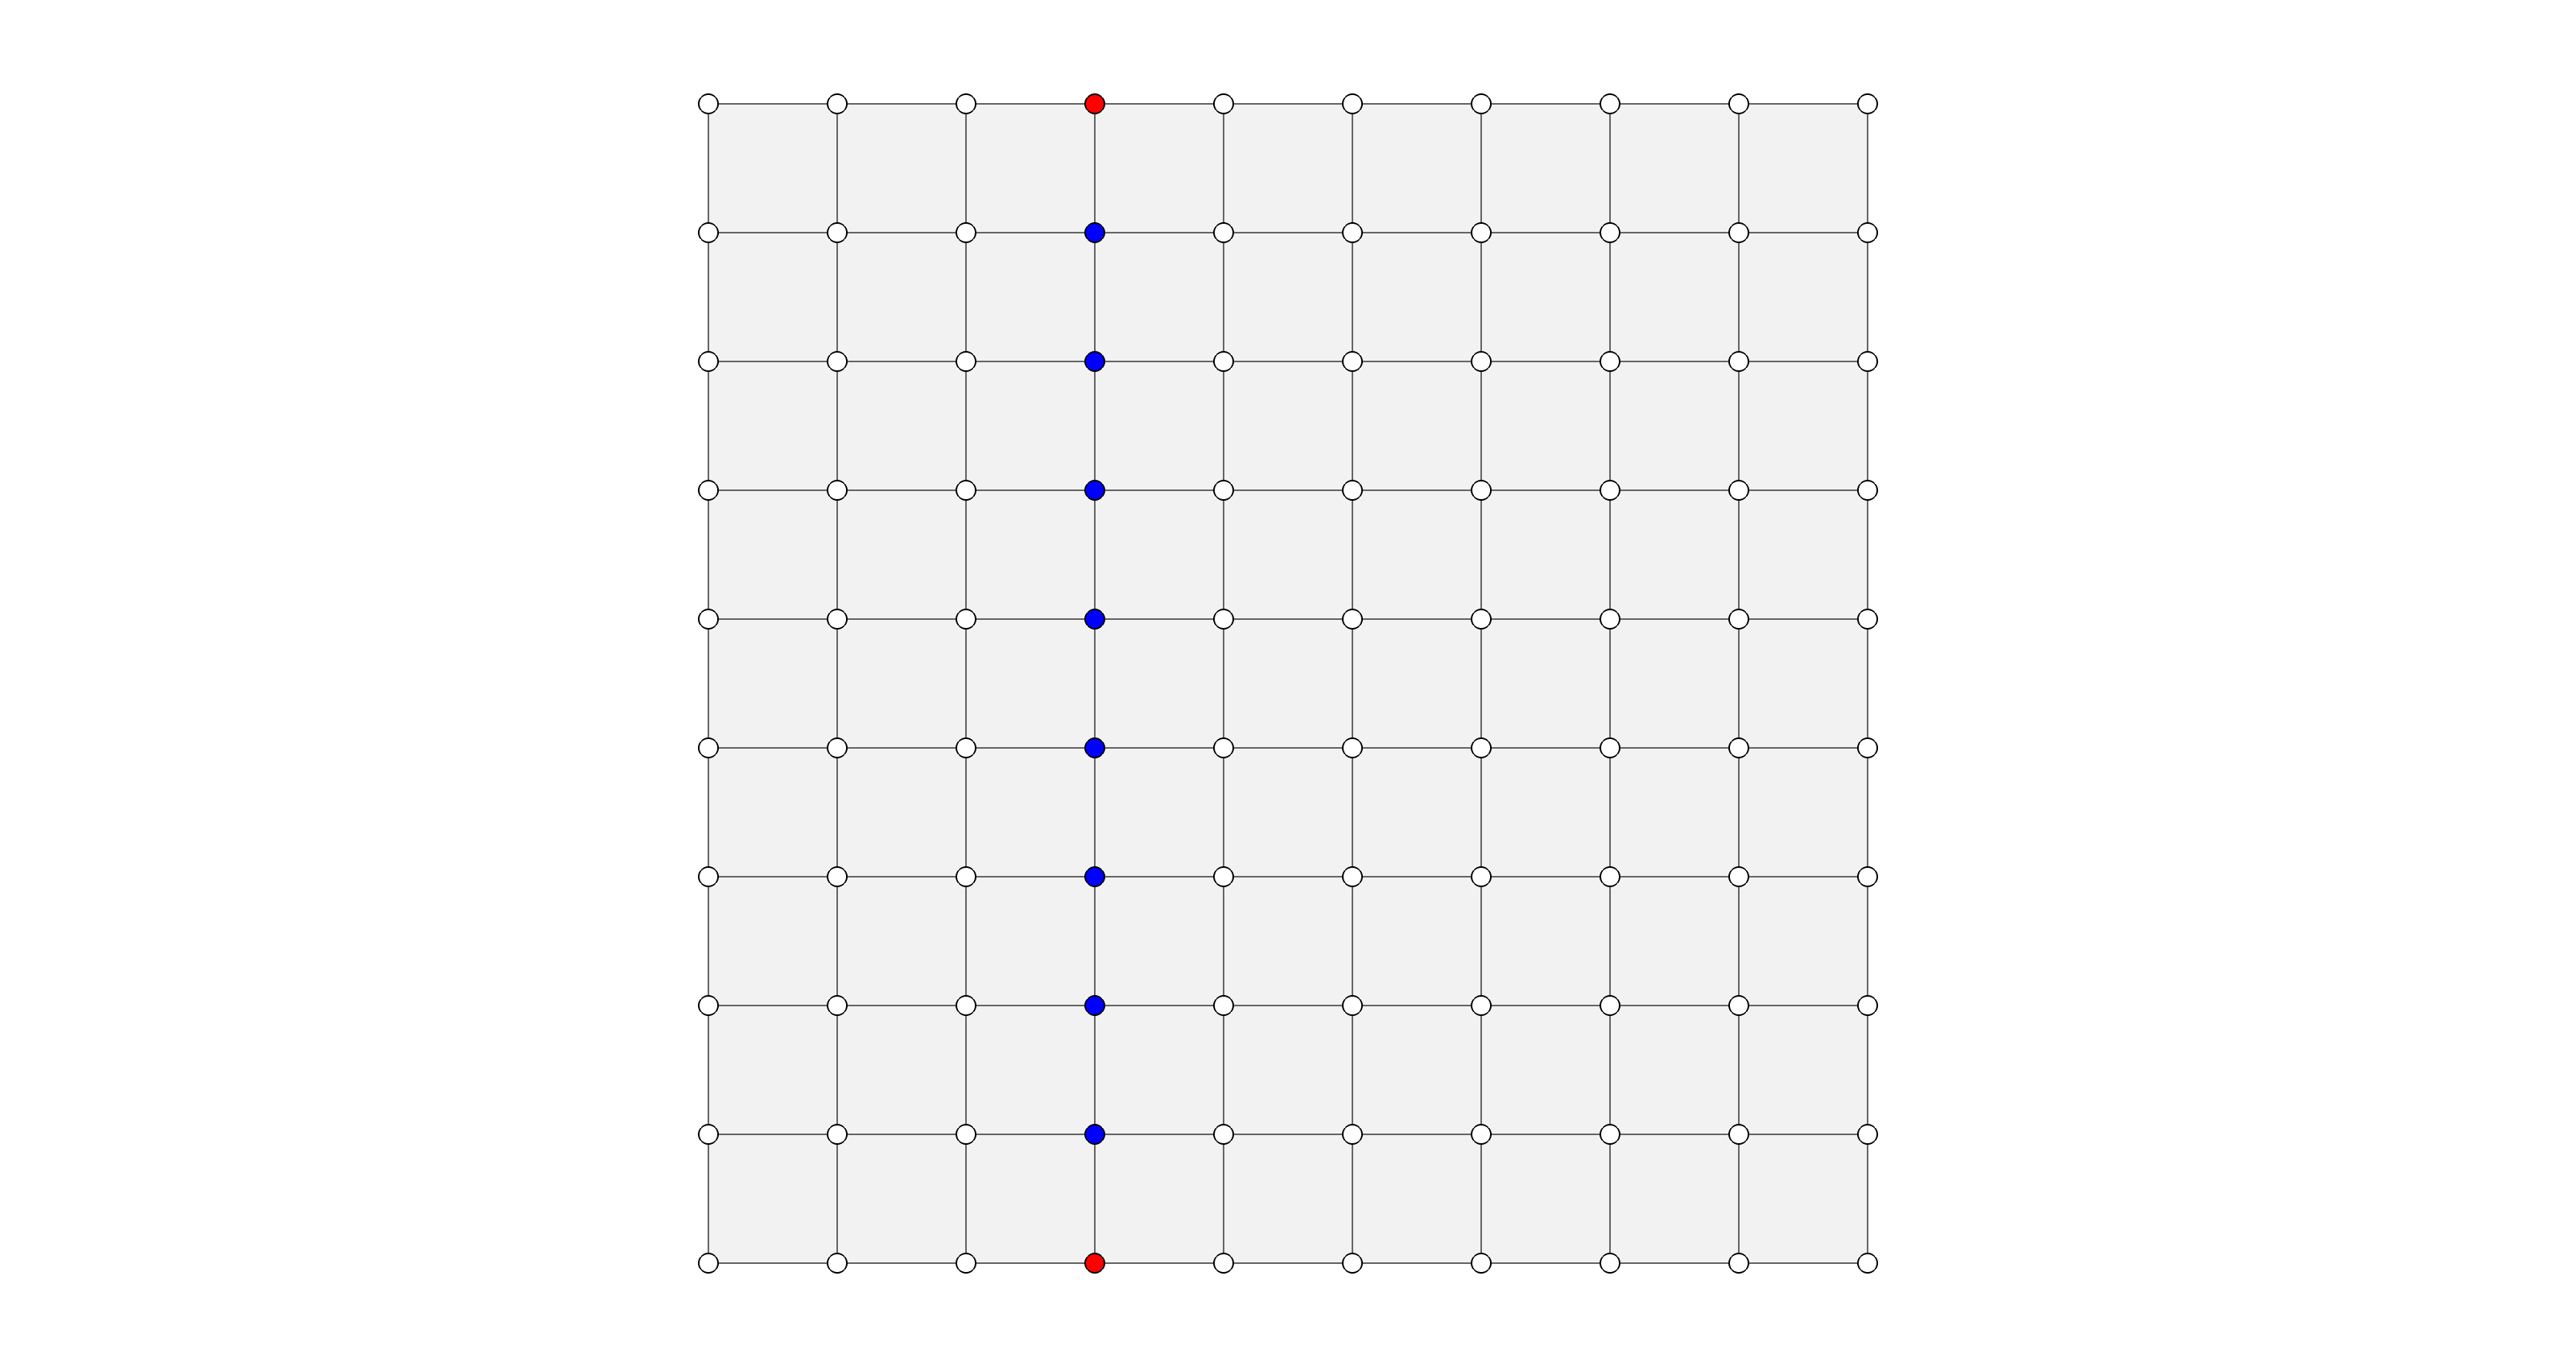
Note that in a mesh constructed using compas.datastructures.Mesh.from_meshgrid(), the vertices are organised in a specific way.
We will use that structure to explain some of the topological concepts more easily.
>>> mesh = Mesh.from_meshgrid(dx=9, nx=9)
>>> for i in range(0, 10):
>>>     print(mesh.is_vertex_on_boundary(i))
...
True
True
True
True
True
True
True
True
True
True
>>> for i in range(30, 40):
>>>     print(mesh.is_vertex_on_boundary(i))
...
True
False
False
False
False
False
False
False
False
True
Halfedge Cycles
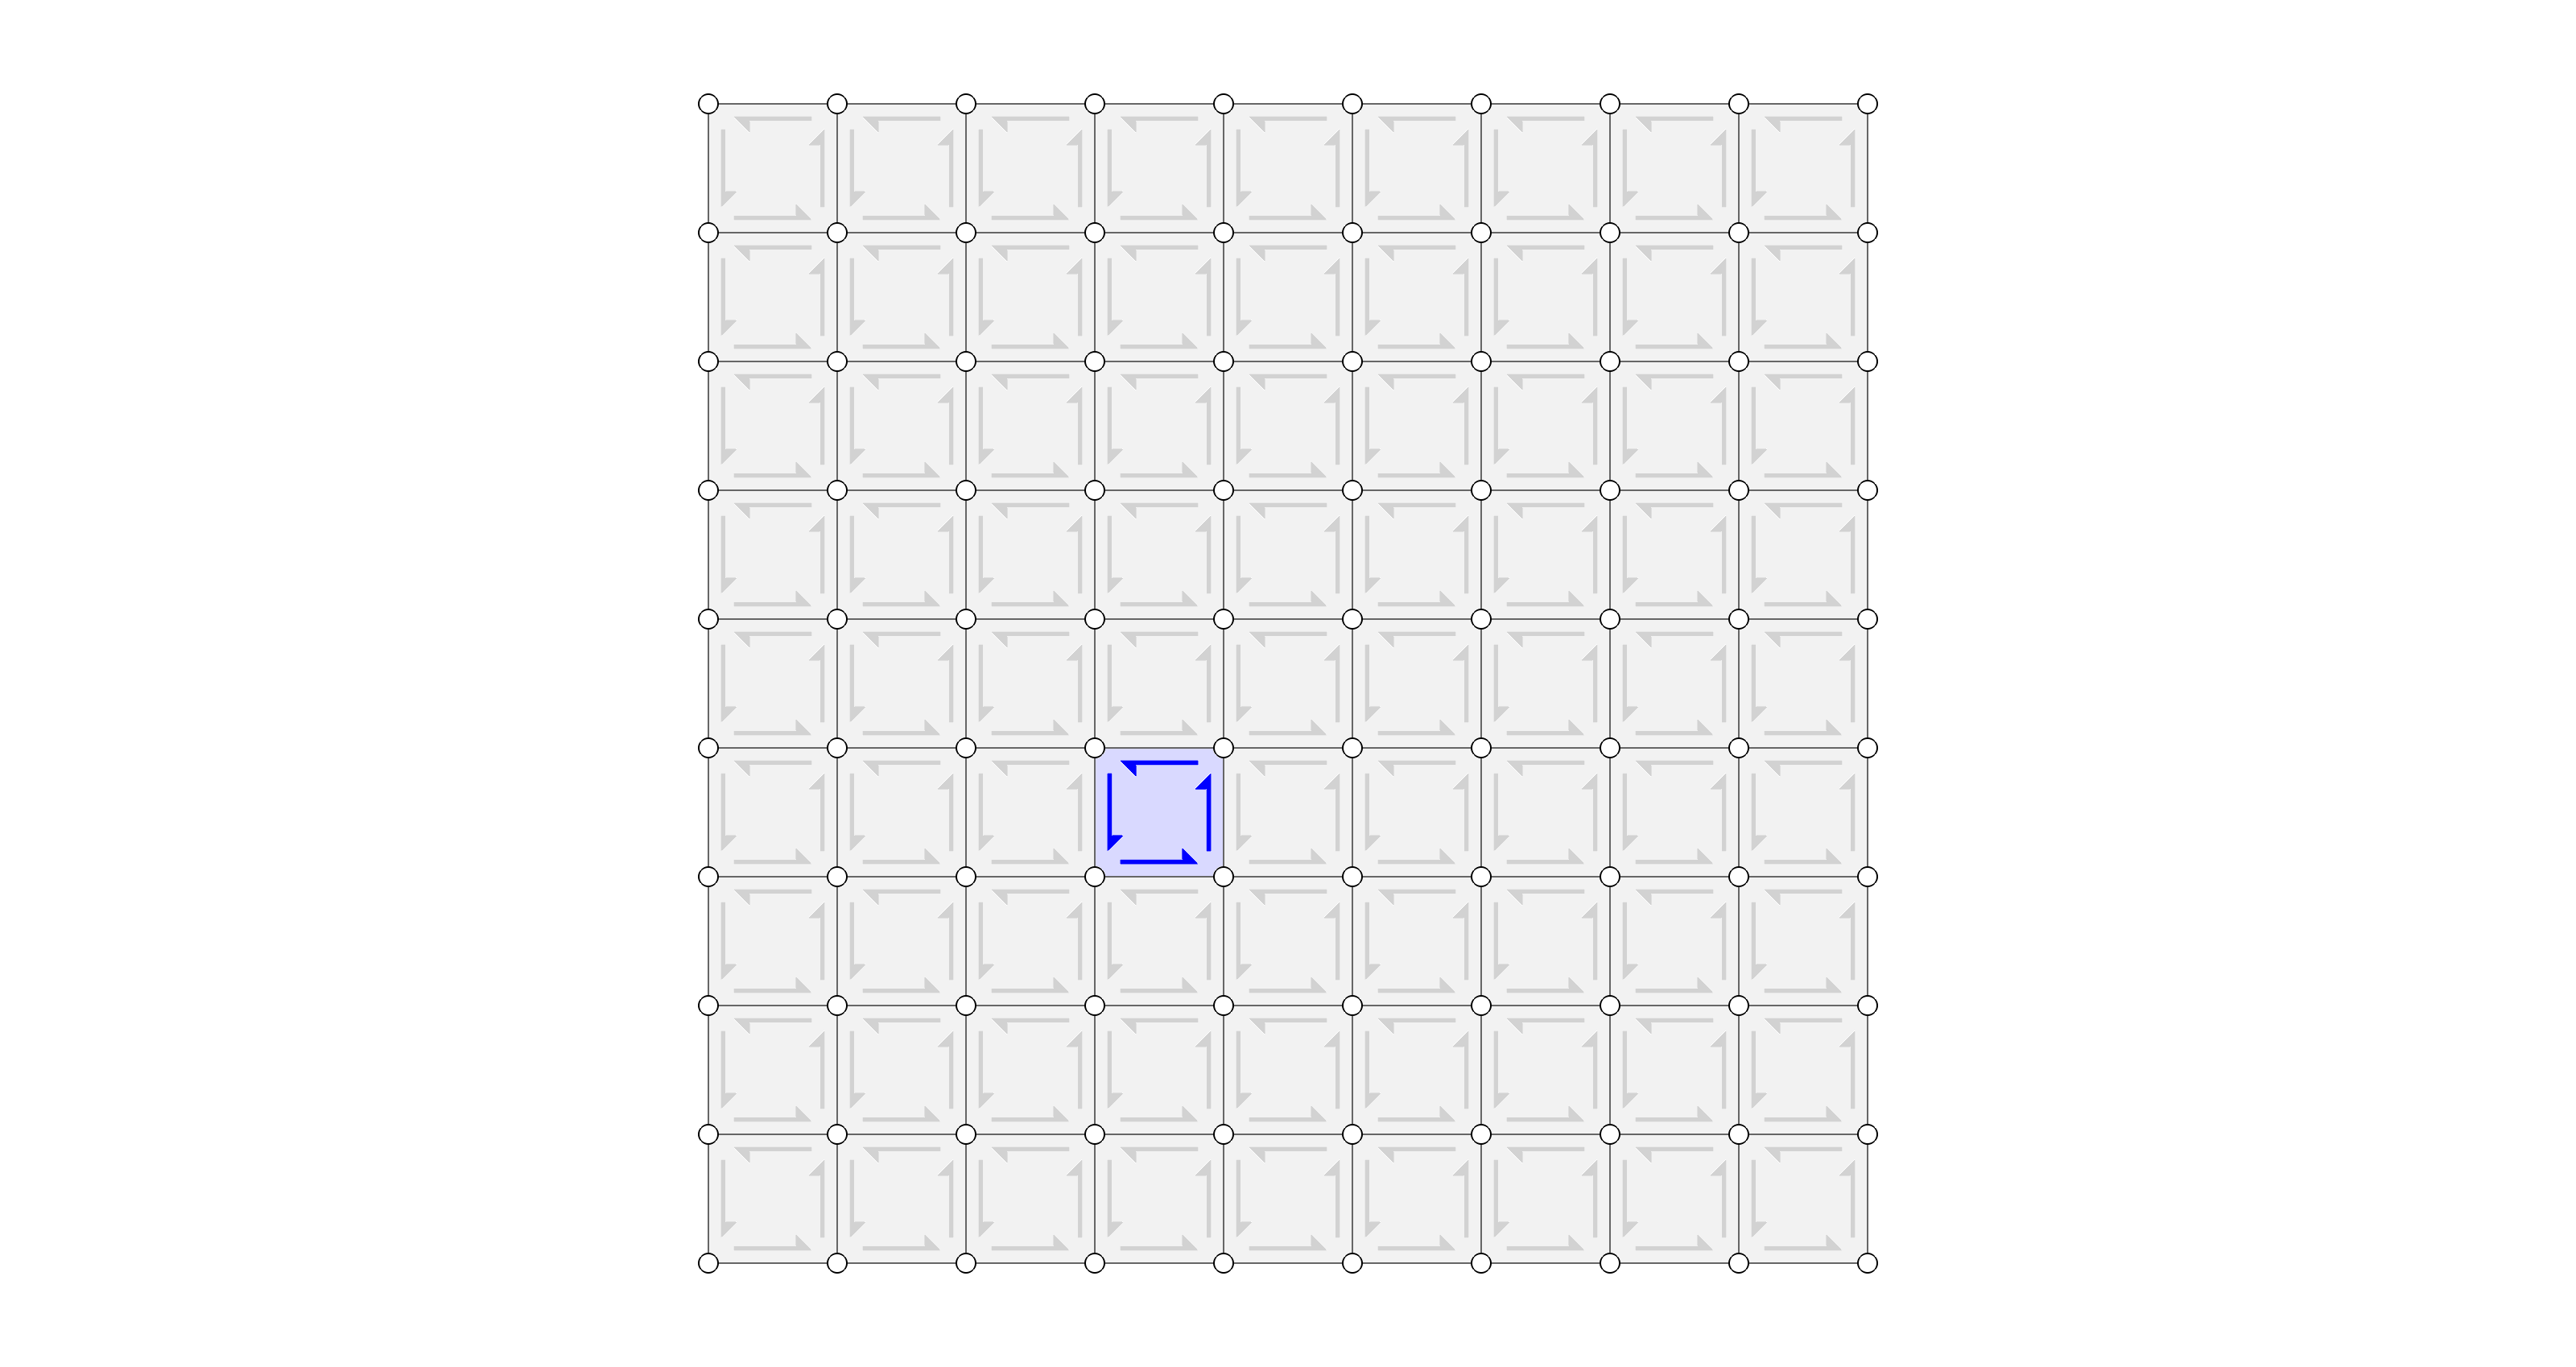
The vertices of a face of the mesh are ordered in a continuous cycle. Every two consecutive vertices are connected by a halfedge of the face. Like the vertices, the halfedges of a face form a continuous cycle. In a valid halfedge mesh, all the cycle directions are consisten. By cycling the faces, each edge is traversed exactly twice, in opposite direction, except fo the edges on the boundary.
>>> for face in mesh.faces():
...     for edge in mesh.face_halfedges(face):
...         print(mesh.halfedge_face(edge) == face)
...
True
True
...
True
Using a combination of the halfedge functions, it is possible to traverse the mesh in a number of ways.
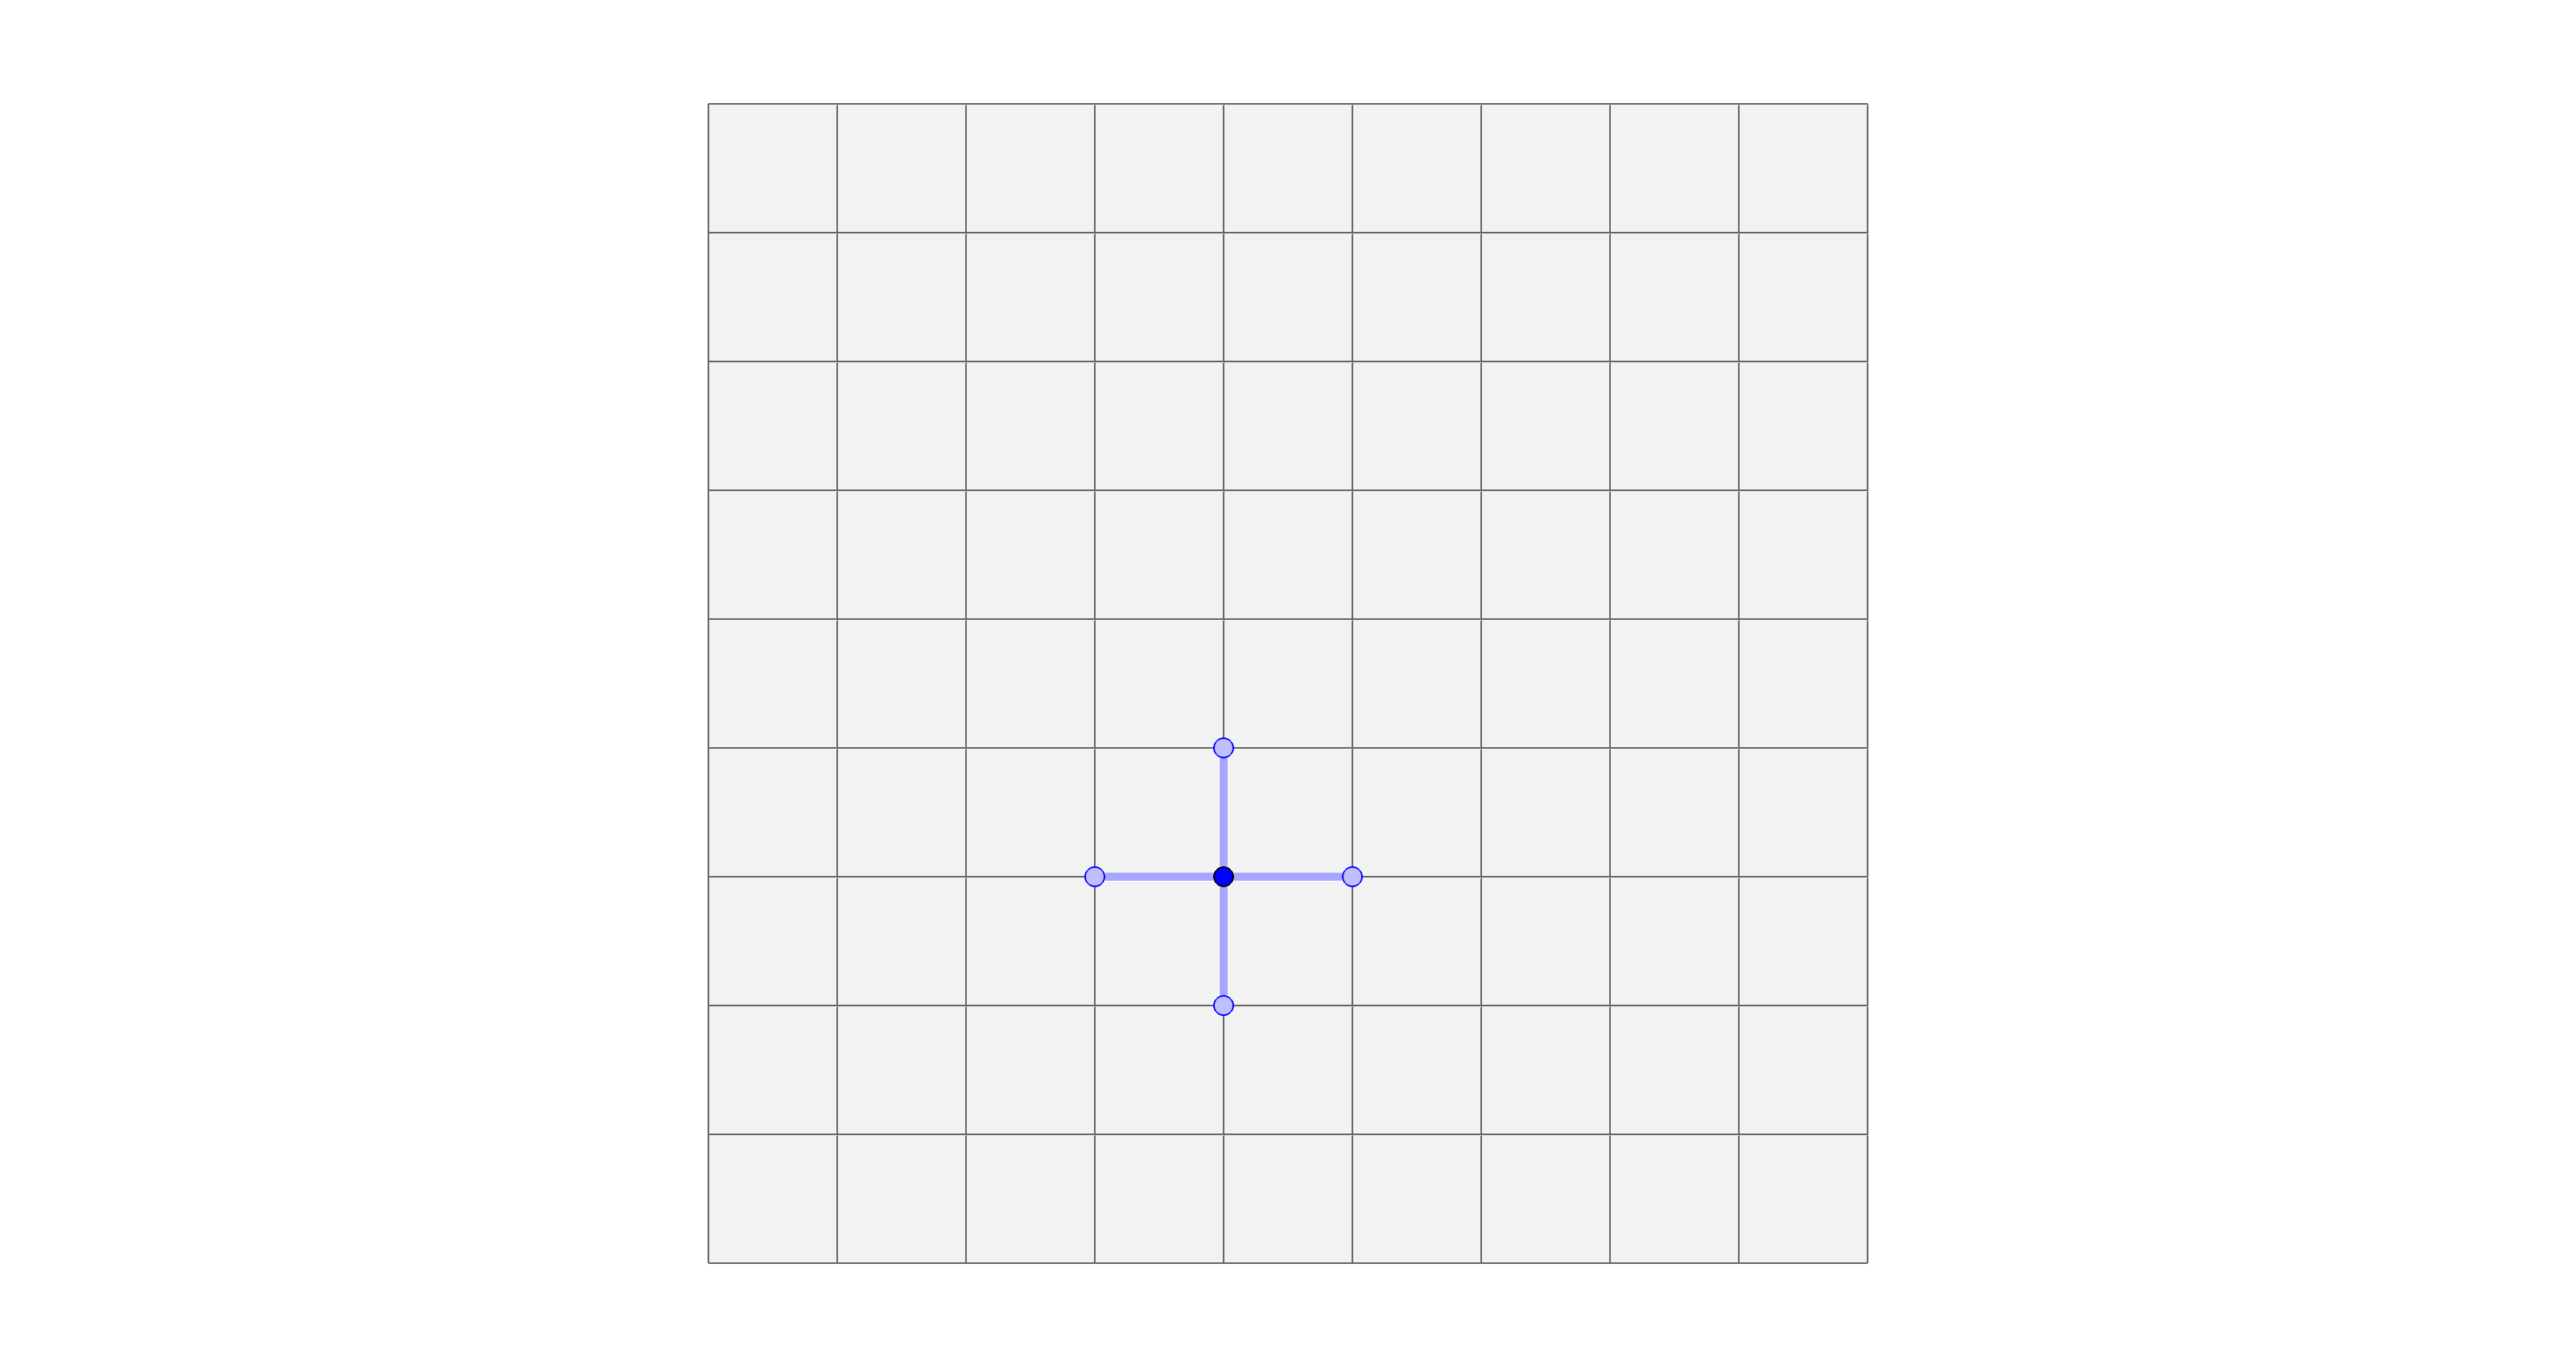
Neighbours
>>> for i, nbr in enumerate(mesh.vertex_neighbors(23, ordered=True)):
...     print(i, nbr)
...
0 22
1 13
2 24
3 33
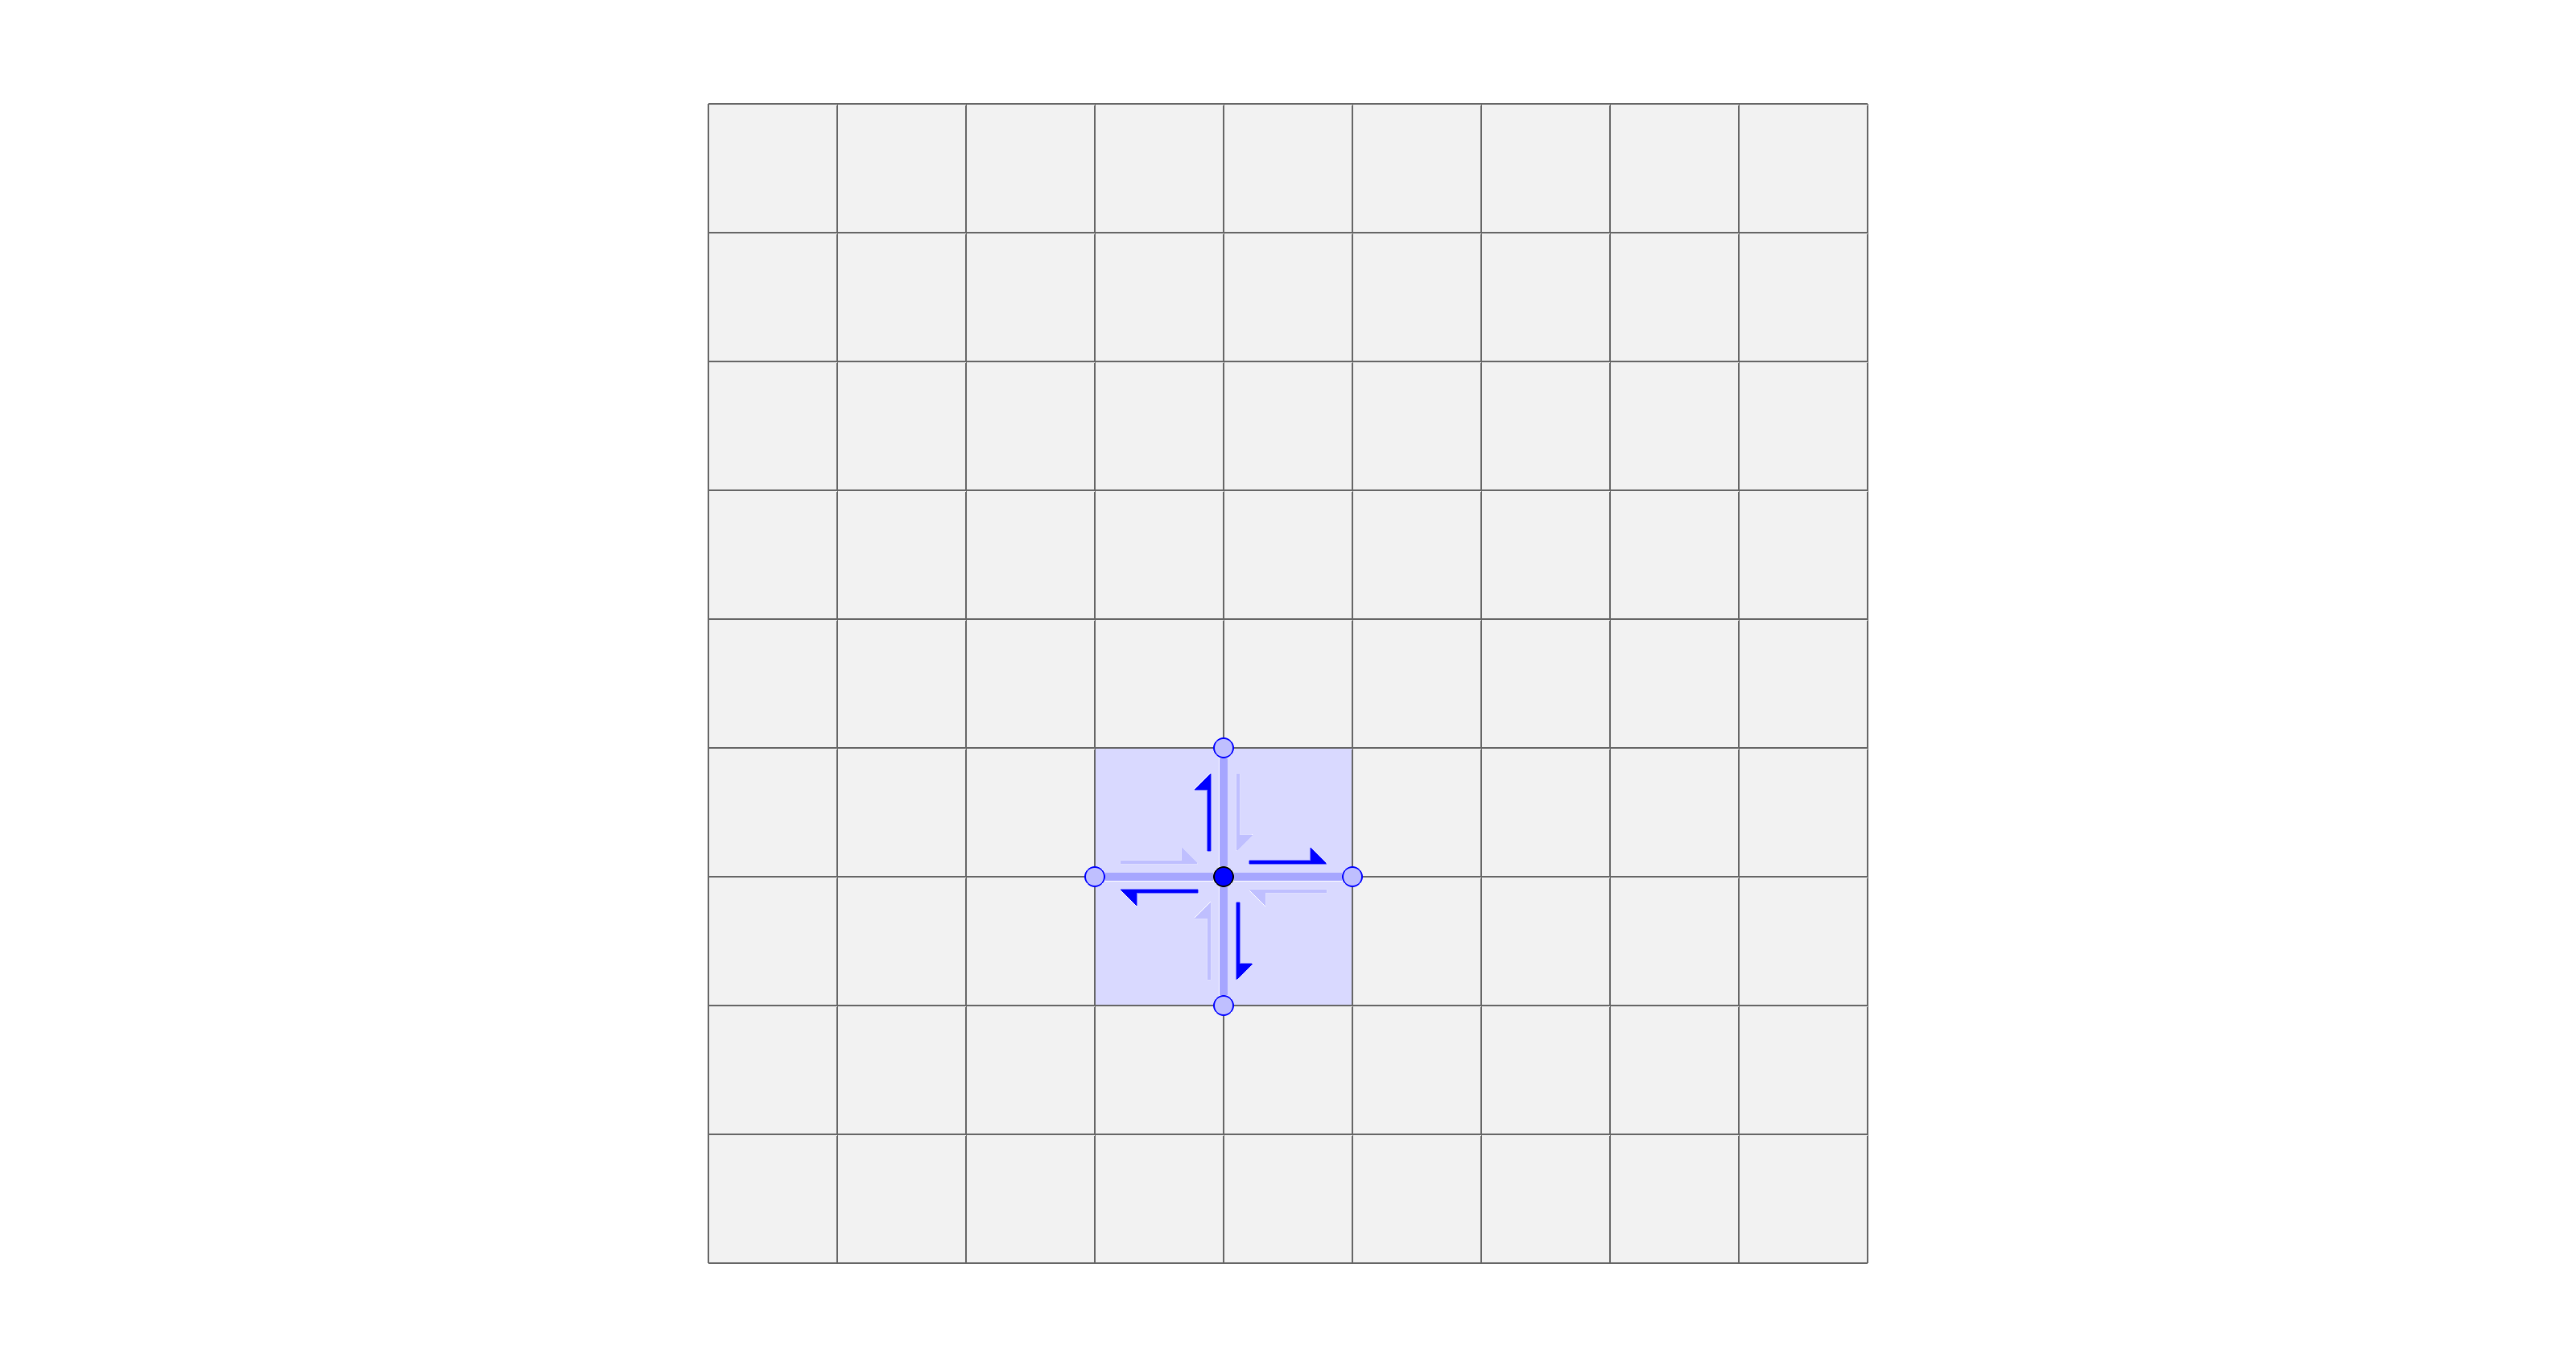
>>> for i, face in enumerate(mesh.vertex_faces(23)):
...    print(i, face)
...
0 20
1 11
2 12
3 21
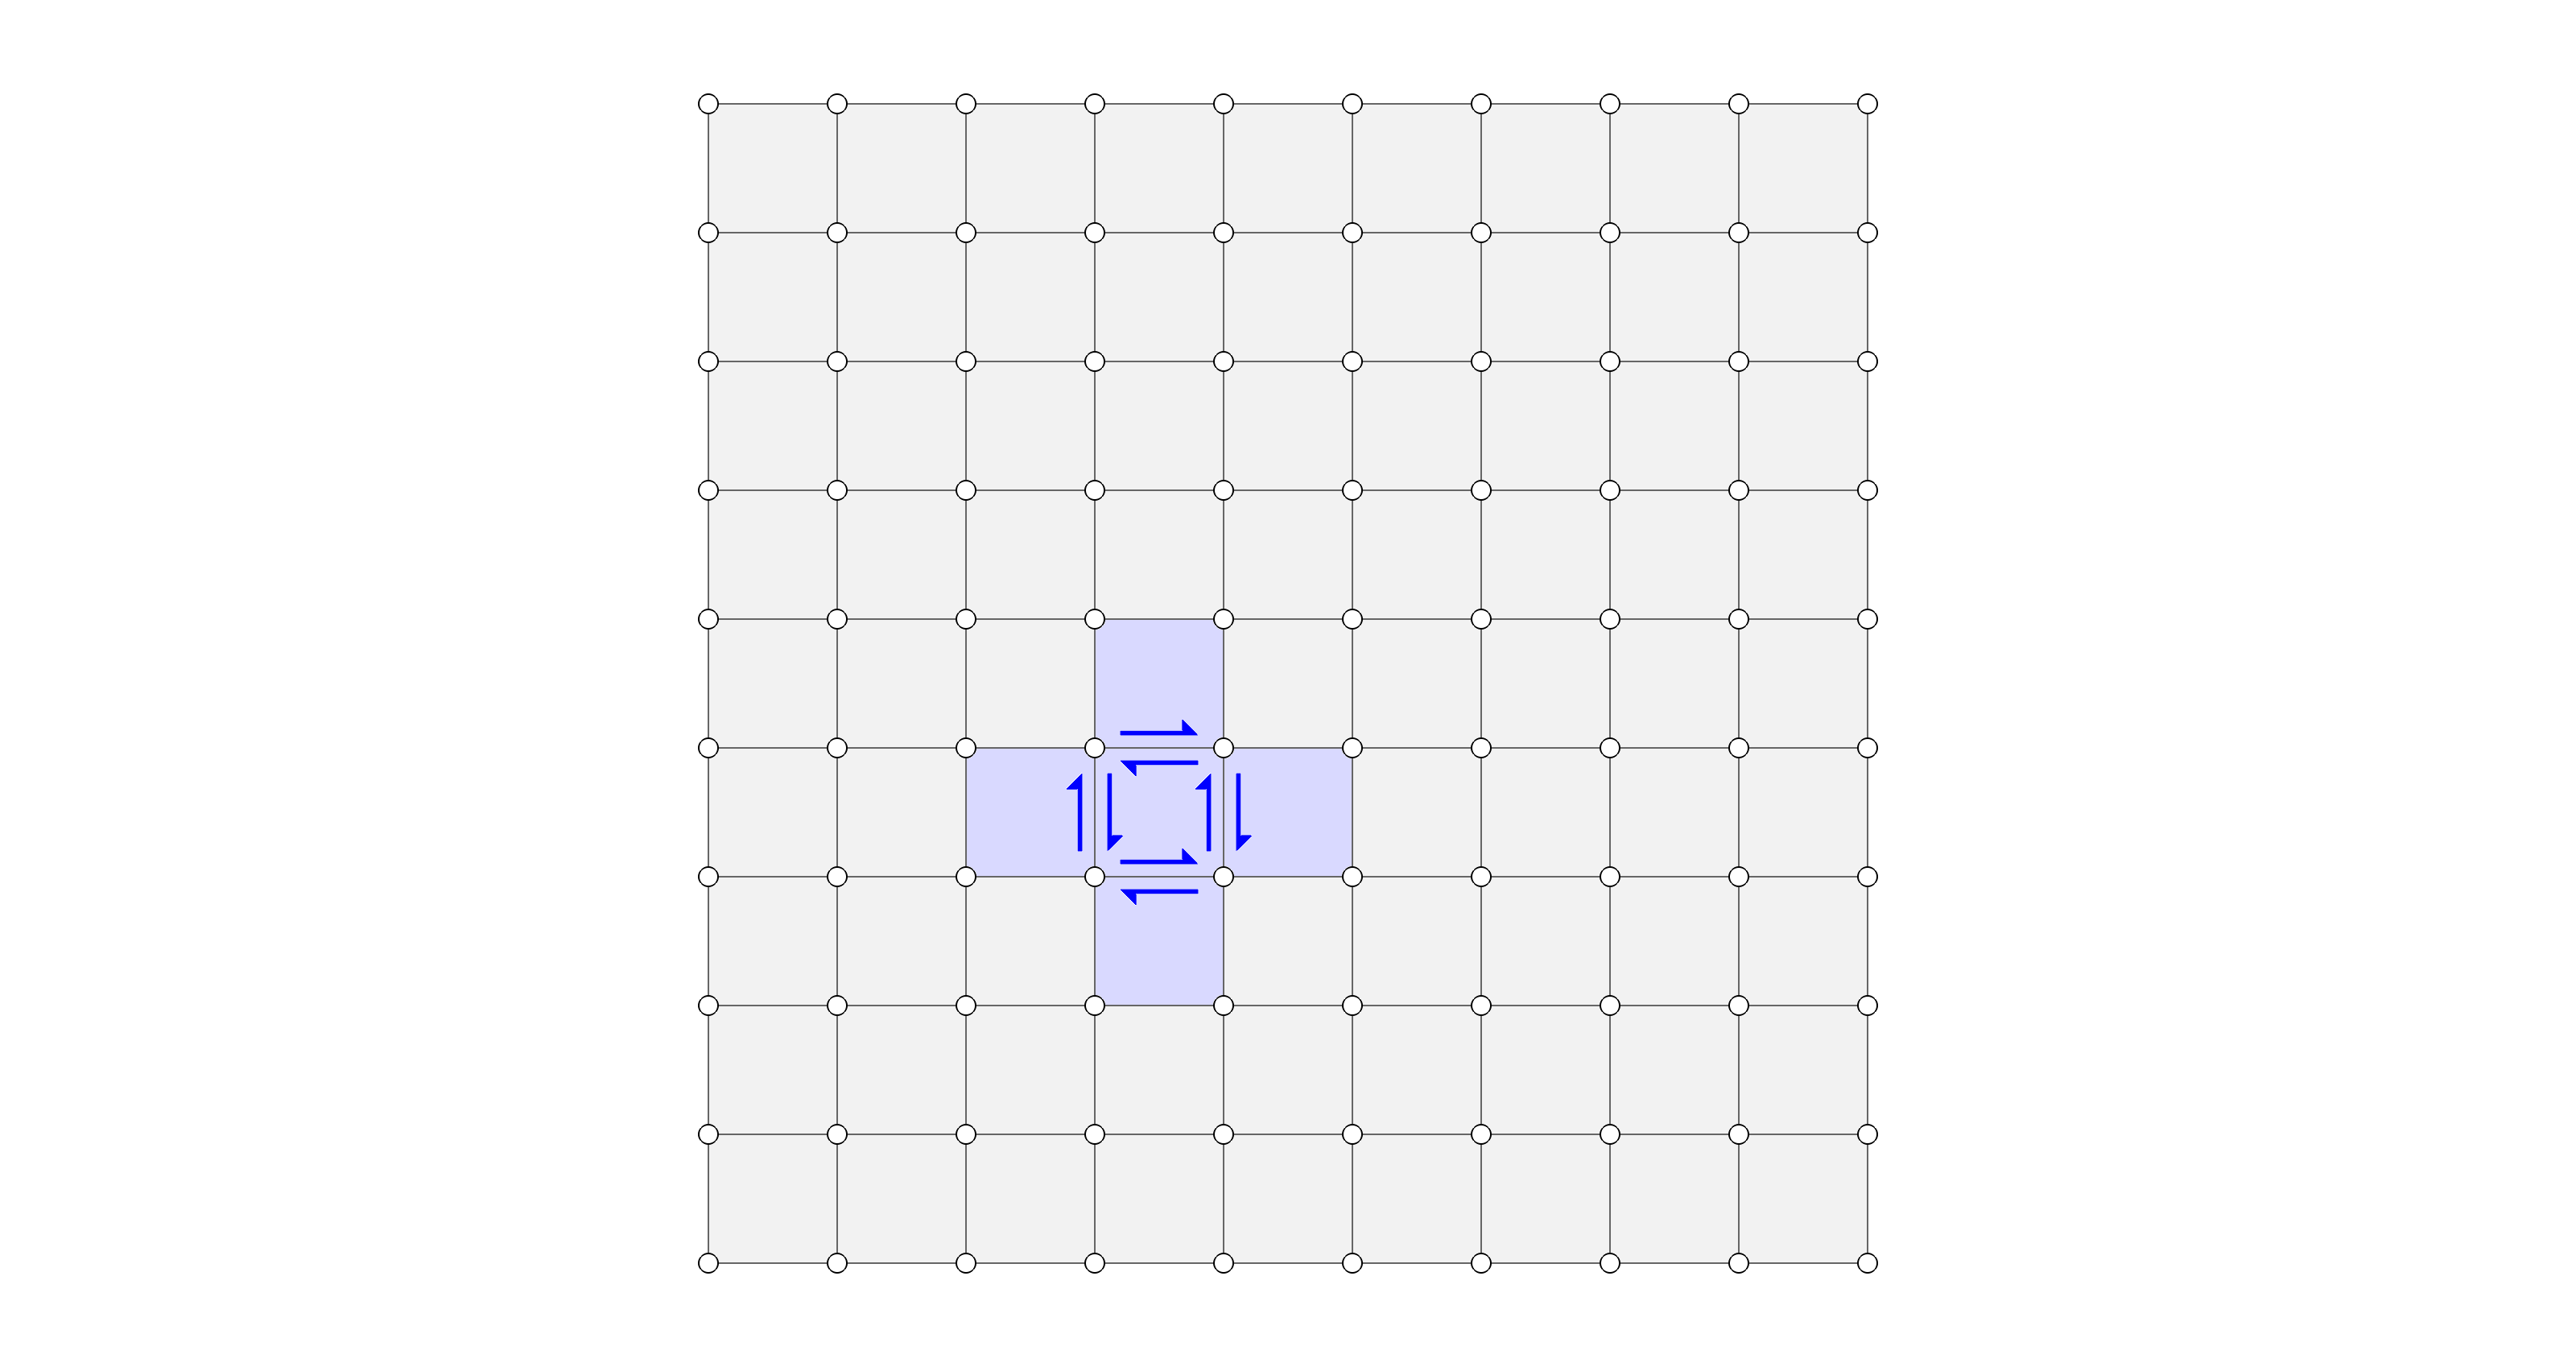
>>> for i, nbr in enumerate(mesh.face_neighbors(21)):
...     print(i, nbr)
...
0 20
1 22
2 23
3 24
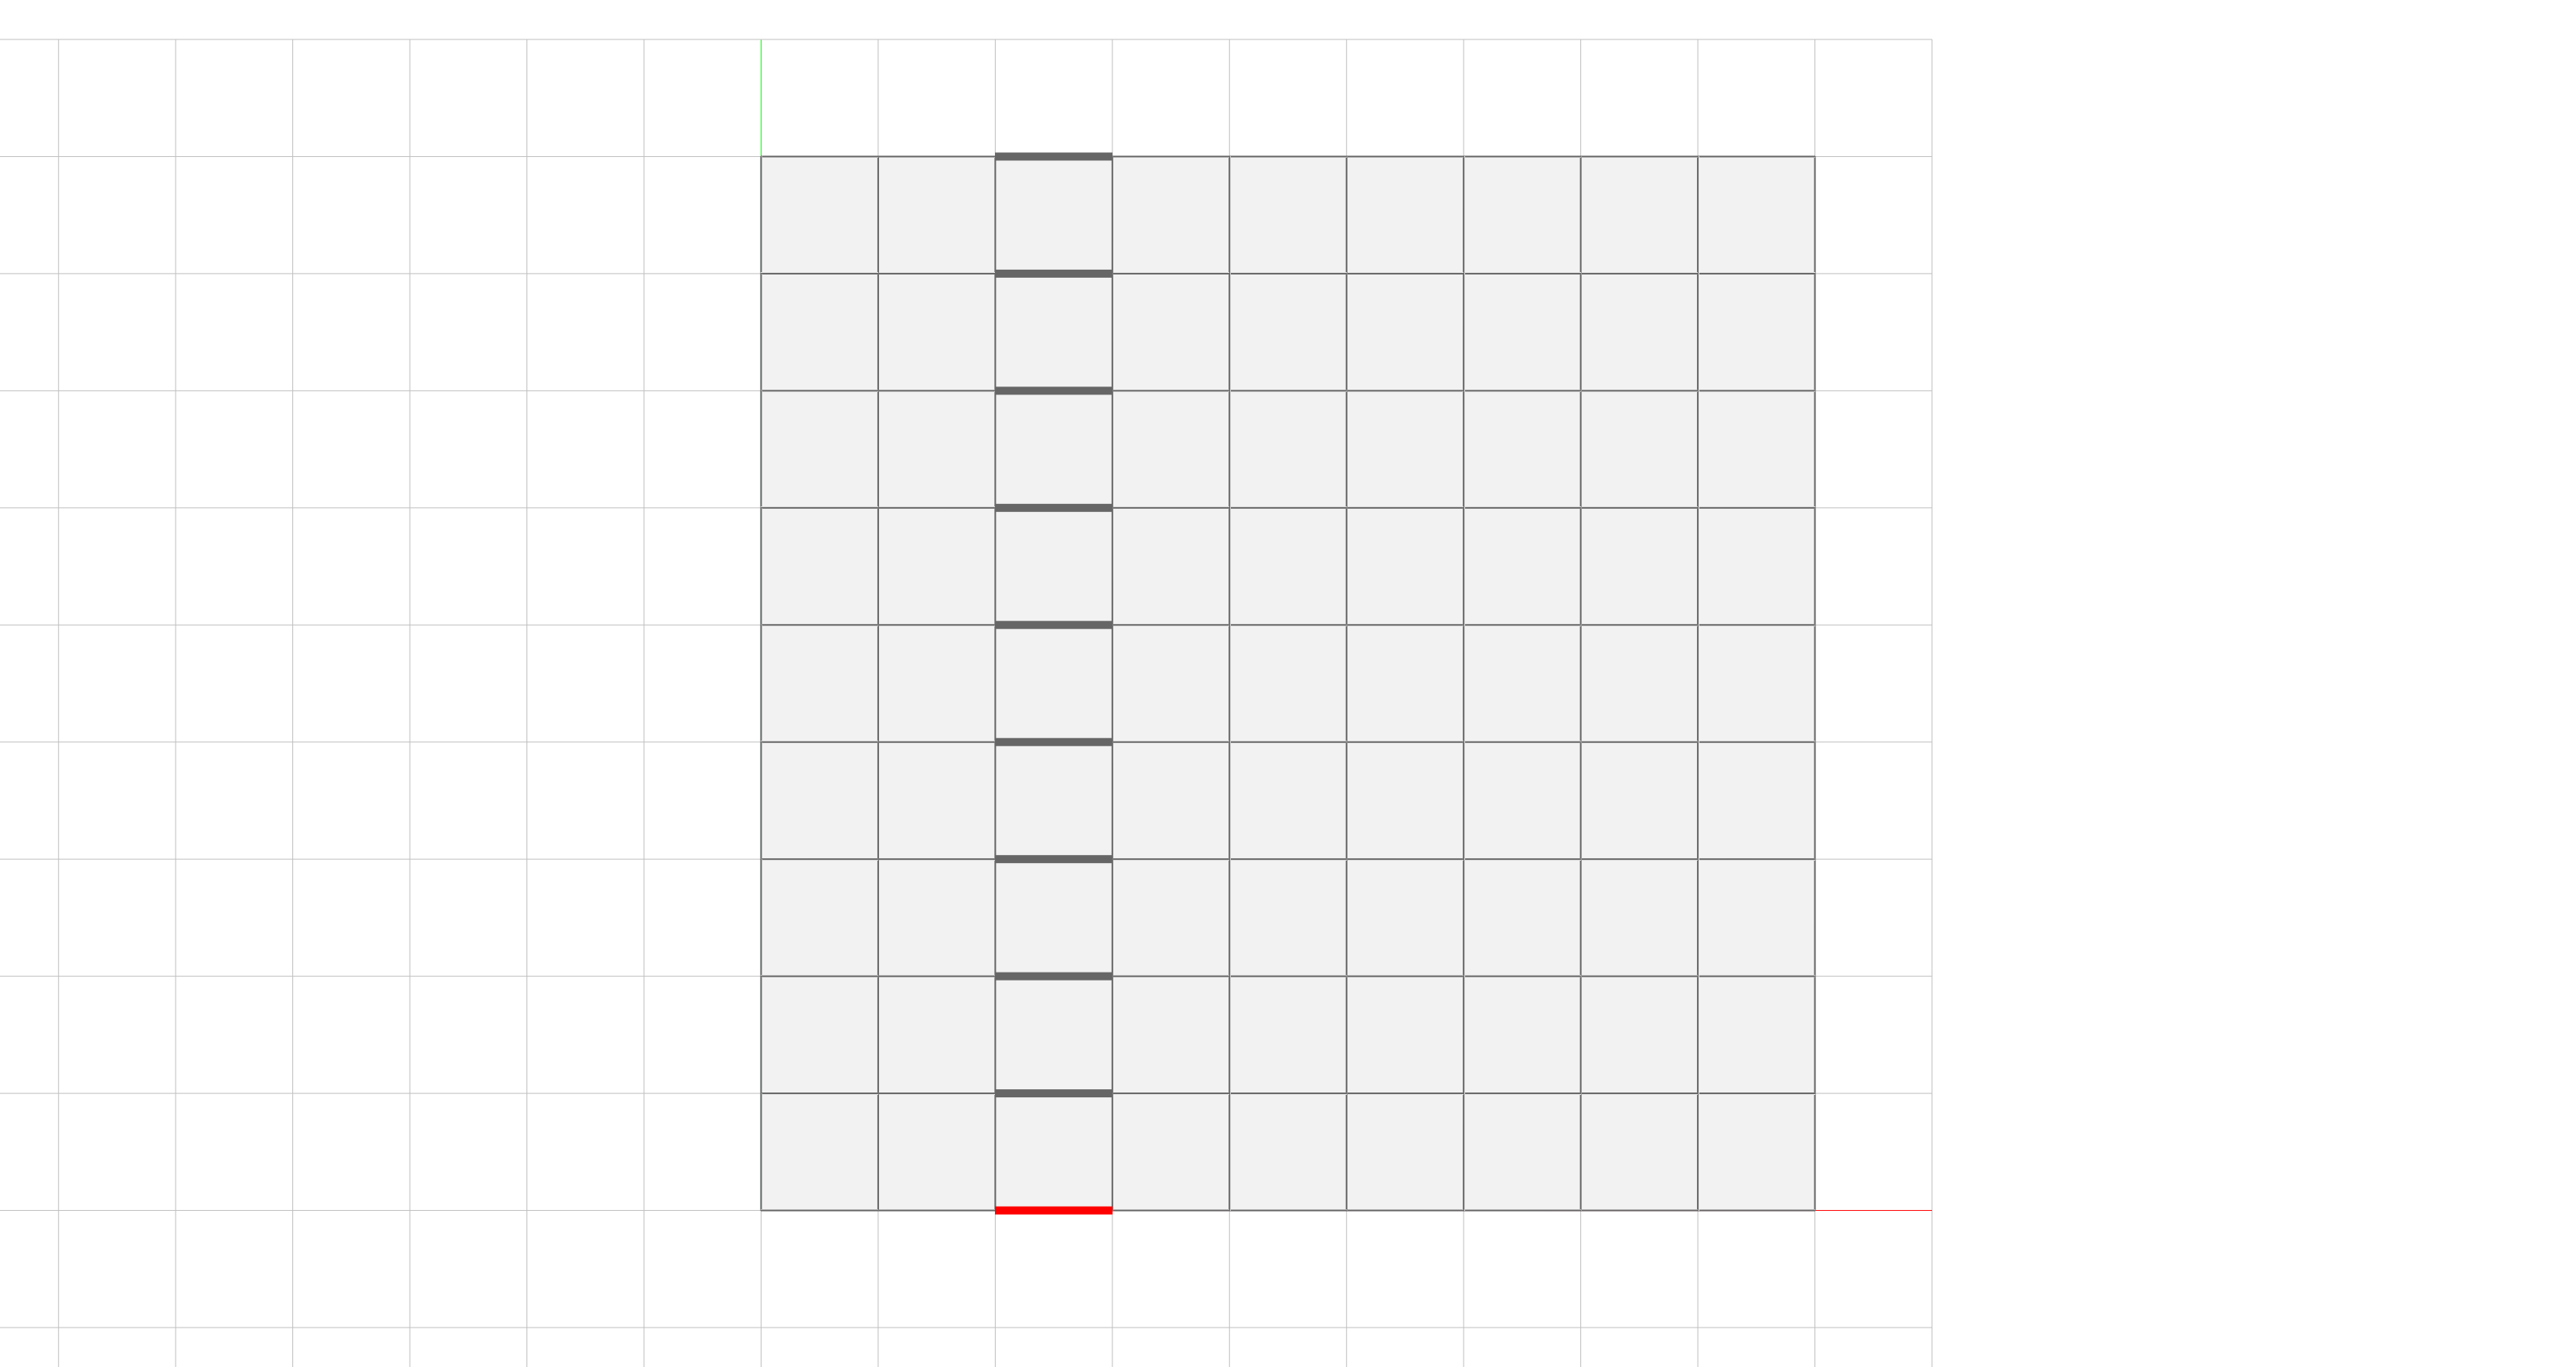
Loops and Strips
>>> for edge in mesh.halfedge_loop((32, 33)):
...     print(edge)
...
(32, 33)
(33, 34)
(34, 35)
(35, 36)
(36, 37)
(37, 38)
(38, 39)
>>> for edge in mesh.edge_loop((62, 63)):
...     print(edge)
...
(60, 61)
(61, 62)
(62, 63)
(63, 64)
(64, 65)
(65, 66)
(66, 67)
(67, 68)
(68, 69)
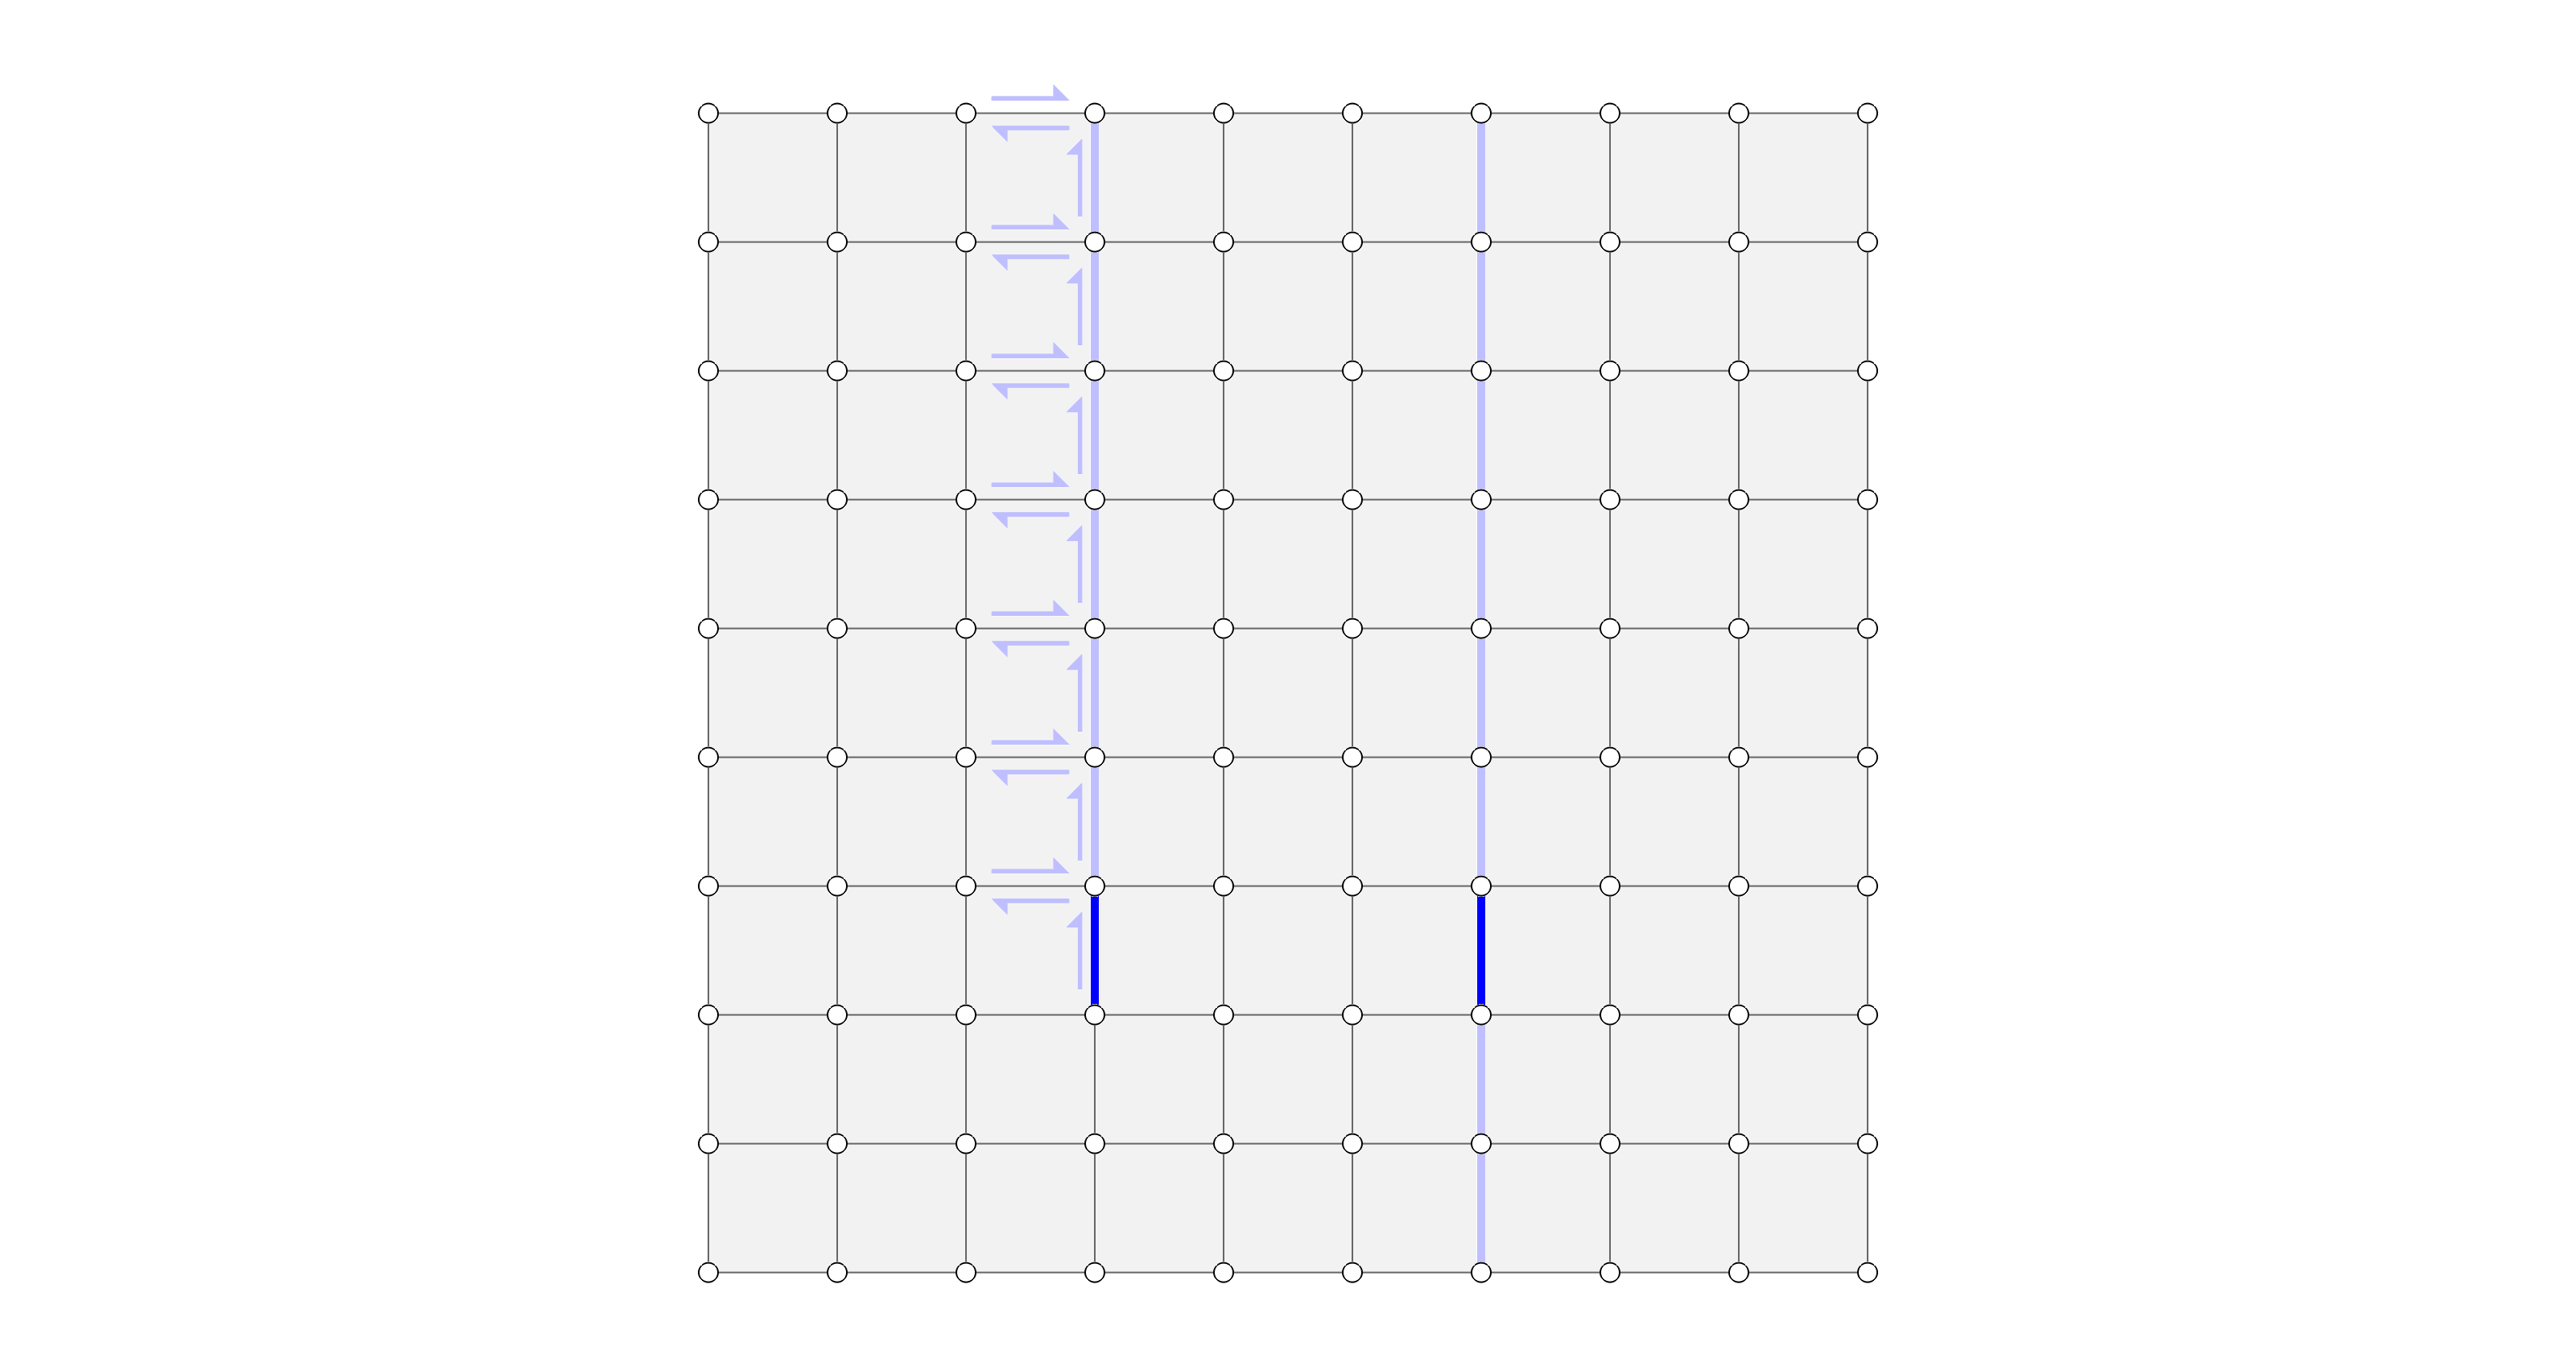
>>> for edge in mesh.edge_strip((20, 30)):
...     print(edge)
...
(20, 30)
(21, 31)
(22, 32)
(23, 33)
(24, 34)
(25, 35)
(26, 36)
(27, 37)
(28, 38)
(29, 39)
Mesh Geometry
vertex_point
vertex_area
vertex_normal
vertex_laplacian
vertex_curvature
face_area
face_normal
face_flatness
face_circle
face_centroid
face_polygon
edge_vector
edge_line
edge_midpoint
edge_length
edge_direction
Filtering
vertices_where
edges_where
faces_where
Mesh Serialisation
>>> mesh.to_json('mesh.json')
>>> mesh = Mesh.from_json('mesh.json')
>>> mesh
<Mesh with 121 vertices and 200 faces>
>>> s = mesh.to_jsonstring()
>>> mesh = Mesh.from_jsonstring(s)
>>> mesh
<Mesh with 121 vertices and 200 faces>
>>> session = {'mesh': mesh, 'a': 1, 'b': 2}
>>> compas.json_dump(session, 'session.json')
>>> session = compas.json_load('session.json')
>>> mesh = session['mesh']
>>> mesh
<Mesh with 121 vertices and 200 faces>
A Simple Example
mesh from obj
mesh delete faces
mesh remesh
mesh dual
mesh frame subdivision
mesh to FE mesh