1. Introduction
1.1. Overview
The COMPAS SLICER package broadly contains four blocks of code:
Geometry: contains all geometrical entities
Slicers: provides the functionality that generates the sliced model
Print organizers: provides the functionality for embedding fabrication related information to the sliced model
Visualization: visualizes the results in the Rhino-Grasshopper environment
1.1.1. Geometry
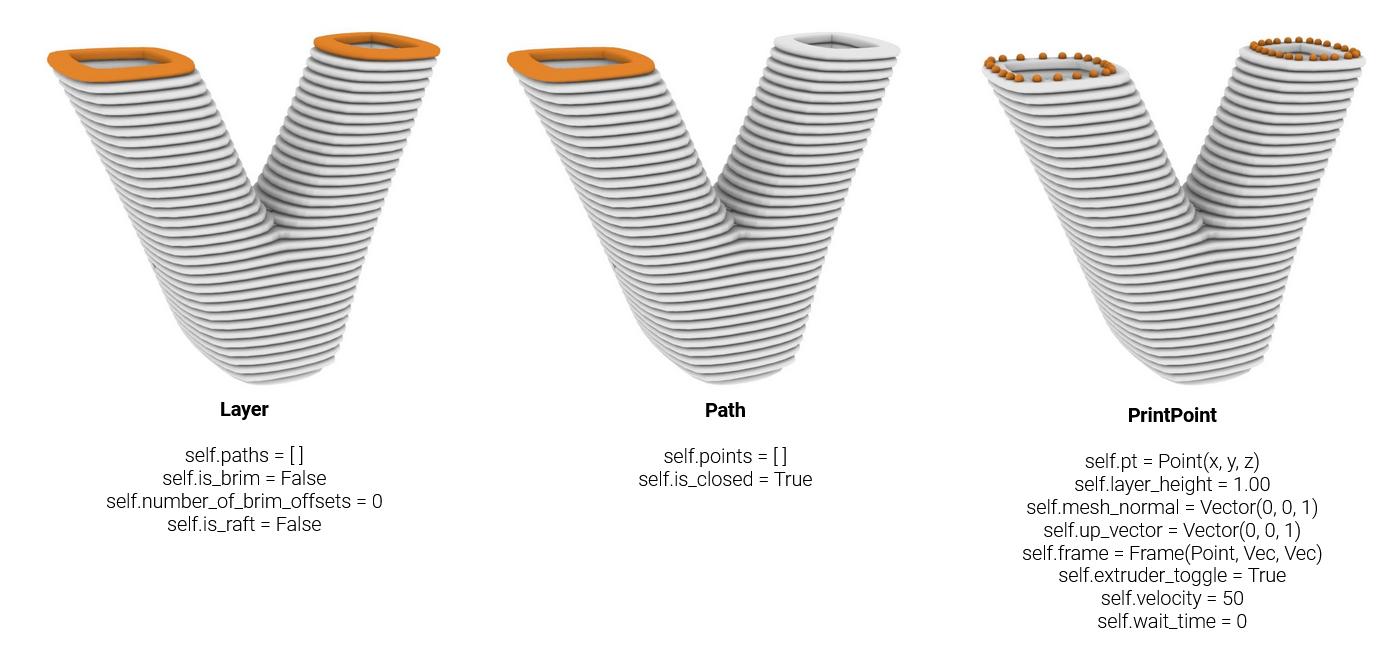
The geometry part of COMPAS SLICER contains all of the geometrical entities that are specific to COMPAS SLICER:
The Layer, VerticalLayer, Path, and PrintPoint. A Layer is essentially a single slice of the model.
In case of planar slicing, all points on one Layer are at the same height, however, this is not the case for non-planar slicing.
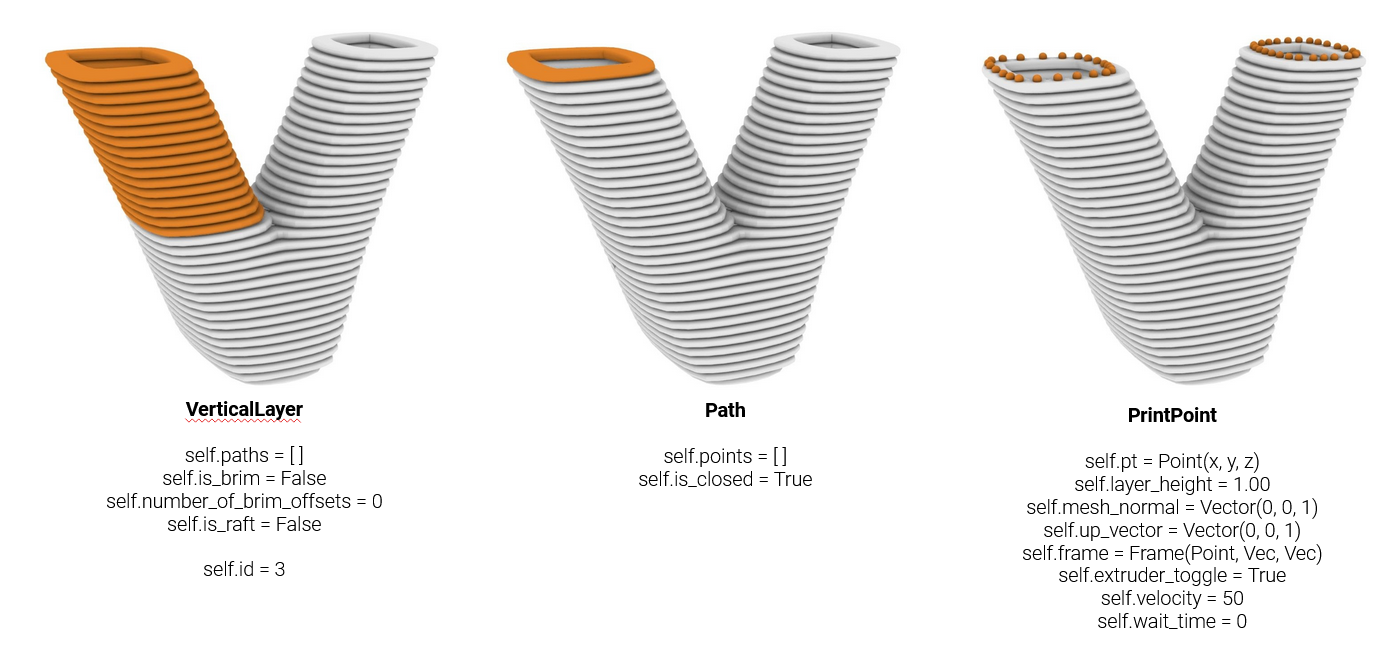
A VerticalLayer is a special method for organizing layers, in this case several Layers are grouped together to form a
group of layers. The VerticalLayer is only relevant in case a model consists out of multiple Paths.
A Layer contains a list of one or mulitple Paths. Multiple Paths occur when a model has multiple branches (see image).
Each Path is a closed or open contour and contains a list of compas.geometry.Point objects.
Lastly, the PrintPoint is essentially the same as the Points in the Path, however, it contains additional fabrication parameters.
1.1.2. Slicers
Different slicers are integrated into COMPAS SLICER.
Planar slicer: Most basic slicer, slices the model through an intersection of a plane parallel to the XY plane.
Interpolation slicer: Creates non-planar slices by interpolating between boundary curves.
Scalar field slicer: Uses a scalar field to create non-planar slices.
UV slicer: TBA.
1.1.3. Print organizers
After the model is sliced using one of the available slicers, the toolpath can be generated using the PrintOrganizers.
The PrintOrganizer creates PrintPoint objects out of the compas.geometry.Point objects that are used throughout the slicing process.
Using different functions, fabrication parameters can be added or modified to the PrintPoints. Examples of this include:
setting the velocity, setting the blend radius, or adding safety printpoints (z-hop).
1.1.4. Visualization
Both the Slicer output and the PrintOrganizer output can be visualized in Grasshopper. More details on this can be found in Tutorial 2.
1.2. Folder structure
The functions of COMPAS SLICER are grouped into different folders:
geometry: Contains the main geometric classes of compas_slicer:
Layer,Path, andPrintPoint.parameters: Contains parameter presets.
pre_processing: Contains various functions that are used before slicing a model, such as repositioning, or various operations for curved slicing.
slicers: Contains the slicer classes.
print_organization: Contains the print organization classes. These take a sliced model and embed on it all necessary fabrication-related information.
post_processing: Contains various functions that are used after a model is sliced, such as different methods of sorting, or adding a brim/raft.
utilities: Contains miscellaneous useful functions.